


A custom cloth hoodie for an action figure sounds simple until you're holding a scrap of fabric the size of a stamp and wondering why it won't sit right. Three things decide whether you get a convincing miniature garment or a floppy mess that can't hold a pose: fabric weight, wire placement, and sizing precision. Get one wrong and the whole thing reads as doll clothes. Get all three right and it reads as a garment.
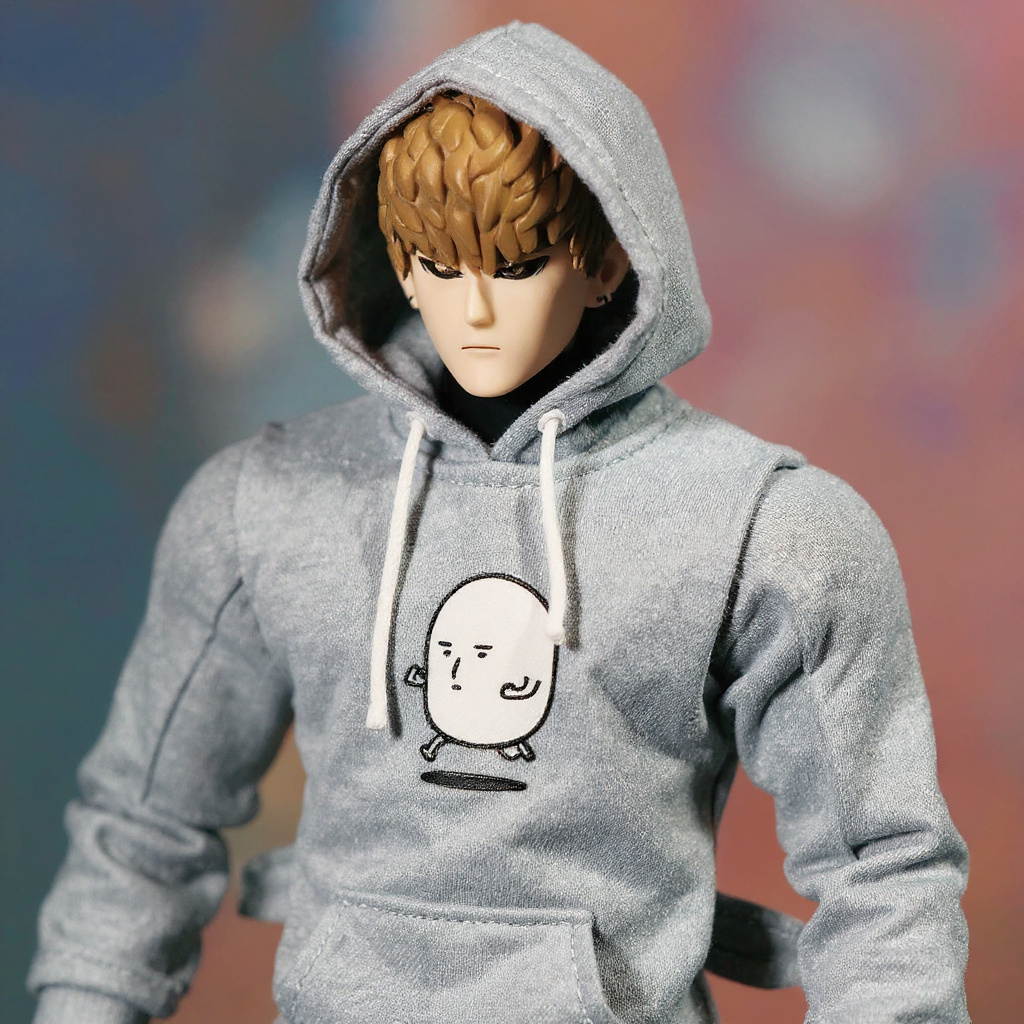
The project we'll reference throughout — a grey hooded cloth top with visible handstitched seams and thin bendable wire running through the hood and sleeve linings, styled after Genos' civilian outfit from One-Punch Man — is a good case study because it's deliberately unglamorous. No zippers, no prints, no complicated hardware. Just fabric, wire, and stitching that has to look handmade without looking sloppy.
Why Fabric Weight Makes or Breaks a Custom Cloth Hoodie for Action Figure Bodies
Scale matters more than most people expect going in. A cotton blend that feels soft and light in your hands will look like a canvas tarp on a 6-inch figure. You need fabric that reads roughly 30% lighter than what feels normal for human-scale clothing — thinner than you'd choose for anything you'd actually wear.
Thin cotton jersey works best for a hoodie at this scale. Skip fleece. Skip terry cloth. They'll make your figure look like it's wearing a sleeping bag with sleeves. The fabric needs some stretch, but not much — too stretchy and the hood won't hold its shape after the third pose change; too stiff and you lose the small folds that sell the illusion of real cloth.
| Fabric Type | Weight (GSM) | Best For | Avoid If |
|---|---|---|---|
| Cotton Jersey | 120–140 | Fitted hoodies | Figure has thick armor |
| Cotton Blend | 100–120 | Oversized looks | You want sharp creases |
| Knit Cotton | 80–100 | Summer hoodies | Cold weather displays |
| Bamboo Blend | 110–130 | Eco-friendly builds | Budget is under $15 |
| Brushed Poly-Cotton | 130–150 | Winter/heavy looks | Figure has slim limbs |
GSM ranges here are measured on a kitchen scale against a 10cm swatch, not pulled from a supplier spec sheet — worth mentioning because supplier numbers are frequently off by 15-20 GSM. For reference on how GSM is calculated industry-wide, see Textile School's GSM guide.
The production version of the Genos Soft Goods Hoodie sits in the cotton jersey range, which is why it drapes instead of tenting over the figure's shoulders. That said — if you're only ever going to display the figure standing straight on a shelf, you can get away with heavier, cheaper fabric. The drape advantage only shows up once you start posing.
Wire Placement: Where the Product Identity Actually Matters
Here's where a lot of tutorials get it wrong for this specific style of garment. They tell you to wire the hood, the sleeves, the hem, and the side seams. For a grey hooded civilian-style top like this one, that's overkill, and it adds bulk you don't need. The wire belongs in two places: the hood lining and the sleeve linings. That's it.
Why those two spots? Because that's where posing actually happens. A hood needs wire to hold a pulled-up or pushed-back position. Sleeves need it so the fabric can bend at the elbow without collapsing into a wrinkled tube. The front hem and side seams don't need wire on a loose, informally-stitched piece like this — they're supposed to hang naturally, not hold a shape.
Wire gauge matters. 22 AWG is the sweet spot for this scale — thick enough to hold position through several pose changes, thin enough to stay invisible under the fabric. For a technical breakdown of gauge-to-thickness ratios, Engineering Toolbox's wire gauge reference is a solid outside source if you want to double check before buying spools.
Routing that works for hood-and-sleeve wire:
1. Hood perimeter: One continuous piece following the hood edge, including around the face opening. 2. Sleeve linings: Wire running the length of each sleeve, stopping about 3mm short of the cuff so it doesn't poke through. 3. Sew it into a channel. Not floating loose inside the lining. Loose wire migrates. It pokes through thin fabric after a dozen pose changes, and there's no fixing that without unpicking the seam.
Honestly, if you're building a figure that's staying in one pose in a case forever, skip the wire. It adds construction time and risk of visible bumps for a benefit you'll never use.
Getting the Fit Right: Measurements That Actually Matter
Most people measure the figure's body. That's the wrong number. You need to measure how the garment should sit on that body, which is a different figure entirely — usually 2-3mm larger everywhere, sometimes less.
For a hoodie: 2-3mm of ease around the chest and shoulders. That sounds tiny. At 1/12 scale it's the entire difference between fitted and baggy. Arms get less room — 1mm ease, maximum, or the sleeves puff up like tubes instead of hanging like fabric.
- Chest circumference: figure's chest + 2-3mm - Shoulder width: figure's shoulder + 1mm each side - Arm length: figure's arm reach minus 2mm, to allow cuff gathering - Torso length: usually mid-hip, varies by character - Hood depth: 15-18mm from neckline to back of head
SHF and Figma bodies cluster around similar dimensions, which is convenient if you're patterning for a specific line. Bootlegs don't play by those rules. Measure the actual figure you own, every time, even if you've made this exact pattern before — I've been burned twice assuming a "standard" body matched my last one.
Stitching Techniques That Look Handmade Without Looking Sloppy
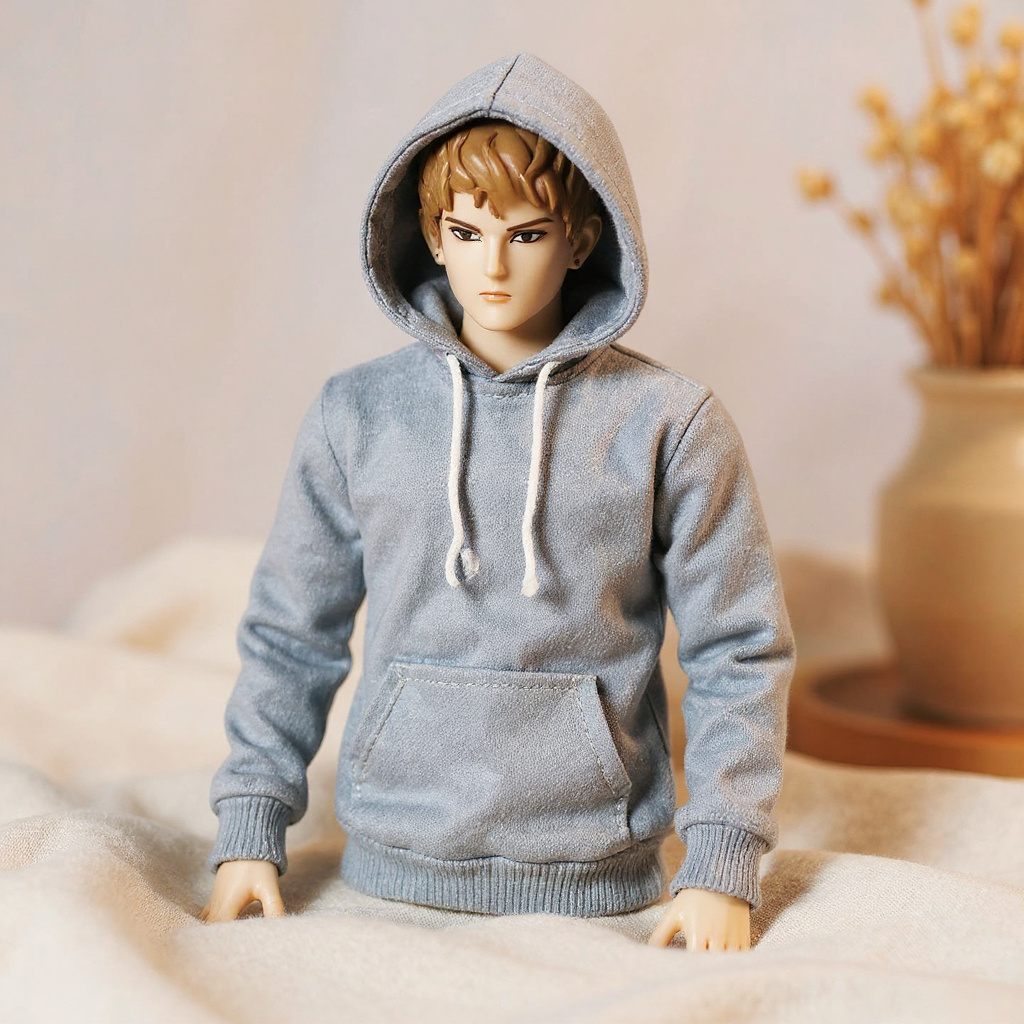
Hand-stitching versus machine work becomes obvious the moment someone photographs the figure up close. Machine stitching is too perfect — too even, which paradoxically looks less real at this scale. Hand stitching gives small, slightly uneven gaps between stitches, and that irregularity is what reads as authentic, handmade soft goods rather than a factory product.
But sloppy hand stitching looks worse than clean machine work. There's a narrow target here. Stitches need to stay small — 1-2mm — and the tension needs to stay roughly consistent, even if the spacing wanders a little. Use thread that matches the fabric. Not close. Matching.
French seams work well for this build because they hide raw edges without adding bulk, which matters when your fabric is already thin enough to show through. A serged edge that disappears on full-size clothing shows up as a visible ridge under figure-scale fabric — you'll see it in photos even if it's invisible to the naked eye across a room.
The Genos Soft Goods Hoodie leans into this rather than hiding it — the seams are visibly handstitched, slightly loose and informal, the way real handmade soft goods look up close. It's not trying to pass as machine-perfect. That's the point.
Common Mistakes That Ruin the Effect
The biggest one: undersized hoods. Collectors size the hood to the figure's head, not to how a real hoodie actually sits. A hood built that way will never cast the shadow over the face that makes it look like fabric instead of a helmet.
Velcro closures are another mistake — thick, visible, wrong. Snap fasteners sized for doll clothing are better, but the real fix is designing the garment to slip on without any closure at all. Harder to pattern. Looks better every time.
Drawstrings trip people up too. Regular sewing thread reads as too thin. Yarn reads as too thick. Thin elastic cord, around 0.5-0.8mm, gives the right visual weight and still functions if the figure's hands can grip it.
Pocket complexity is the last one. Genos' actual civilian outfit is simple, which helps — but plenty of other character outfits have pocket arrangements that just don't survive the jump to 1/12 scale. Simplify. Keep the shape readable, drop the detail that won't show anyway.
Comparing Costs: DIY vs Ready-Made Options
Making your own runs $3-8 in materials if you already own basic sewing supplies, plus 2-4 hours of actual work — more if it's your first attempt and you're unpicking seams. That time cost is easy to underestimate until you've done it once.
| Option | Price Range | Quality | Time Investment |
|---|---|---|---|
| DIY Materials | $3-8 | Depends entirely on skill | 2-4 hours |
| Generic Import | $8-15 | Inconsistent sizing, poor wire placement | 2-4 week wait |
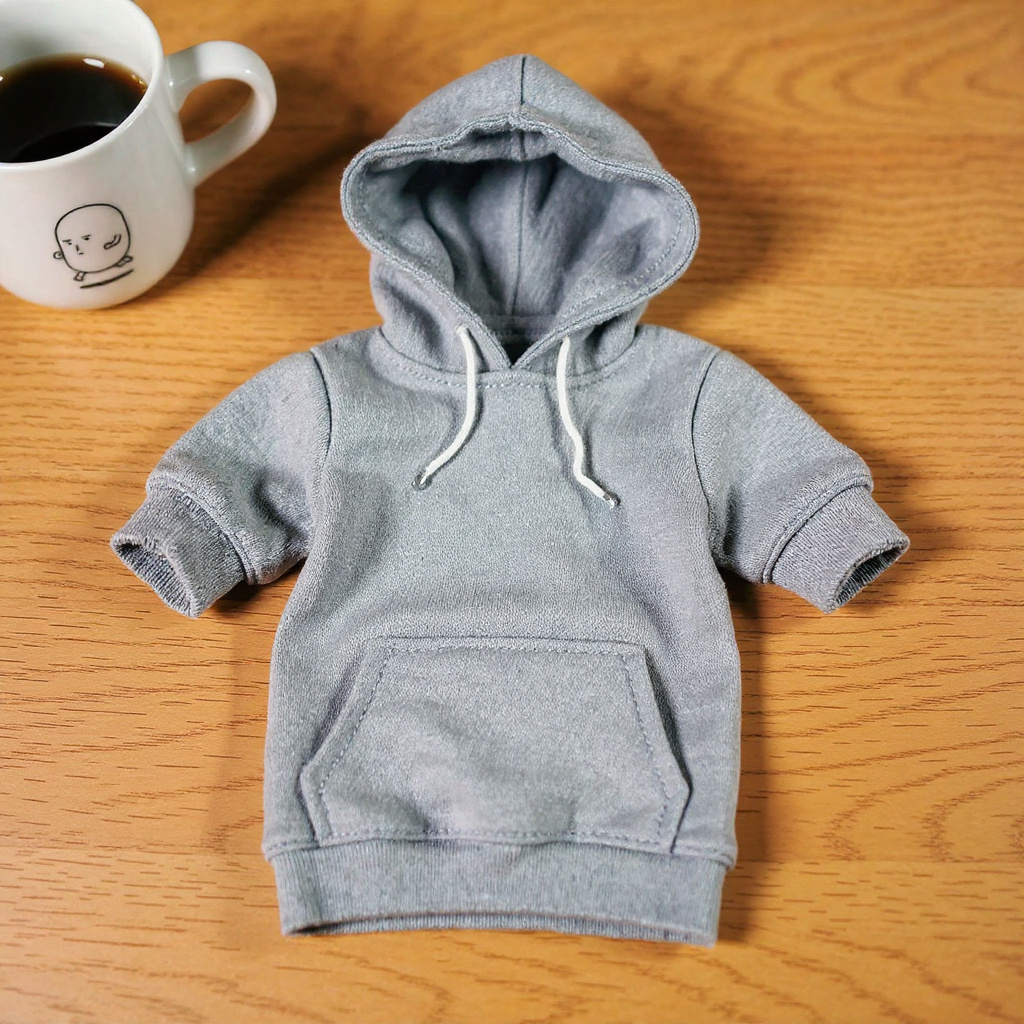
| Mid-range Custom (e.g. Genos Soft Goods Hoodie) | $15-25 | Handstitched seams, wire in hood/sleeves | Order and receive |
| Official Licensed | $25-45 | Often rigid plastic, not cloth | Depends on stock |
| Commission from a maker | $20-40 | Varies by maker, ask for photos first | 1-3 weeks |
A $17.50 piece sits in the middle deliberately — enough construction quality to justify skipping the DIY hours, without the licensing markup that pushes official accessories toward rigid plastic instead of real fabric.
Working with Different Figure Body Types
Not all 1/12 figures share the same skeleton. Tamashii Nations' SHF line runs slimmer through the torso. Figma bodies often carry broader shoulders relative to the waist. Bootlegs can have proportions that are just off, in ways that are hard to predict without a caliper.
1. Slim builds: reduce ease to 1-2mm, shorten torso length. 2. Athletic builds (Genos, most shonen leads): the standard measurements above work as written. 3. Bulky builds: add 1-2mm extra ease, lengthen sleeves slightly. 4. Chibi/SD figures: different proportions entirely — don't try to scale down a standard pattern, start fresh. 5. Bootleg figures: measure twice. Sew once. The dimensions are not reliable.
Collectors frequently mix figure bodies from different manufacturers in the same display case. A hoodie pattern that only fits one specific release is a pattern you'll redraft in six months.
Photographing Your Finished Hoodie
Figure clothing photographs differently than rigid plastic accessories. Fabric creates shadows and texture that can either sell the realism or expose every flaw, depending on the light.
Soft, diffused lighting works best. Harsh directional light picks out every wrinkle and stitch line, which is fine if the stitching is good and bad if it isn't. You want enough contrast to show drape without turning small imperfections into the focal point of the shot.
Wire-posed elements behave differently under a lens too. The hood can cast a real shadow across the face. Sleeves can gather naturally at the elbow. But plan the pose first — a wire hood bent the wrong way photographs as messy, not dynamic.
Why Most Collectors Still Use Rigid Accessories
Despite the visual upgrade, most collectors stick with the plastic accessories that ship with the figure. Not laziness, mostly. Fabric collects dust. It stains. It's harder to clean than plastic, and if you swap poses often, cloth wears faster and wire elements can fatigue and lose their bend over time.
For photography or a premium display piece, fabric still wins by a wide margin. For a figure that gets handled weekly or displayed somewhere dusty, though — honestly, rigid plastic is just more practical, and there's no shame in choosing it.
Frequently Asked Questions
How do I make a custom cloth hoodie for an action figure? Measure the actual figure, draft a paper pattern with 2-3mm ease at the chest and shoulders, cut from lightweight cotton jersey (120-140 GSM), sew with 1-2mm hand stitches, and run 22 AWG wire through the hood and sleeve linings only. Test-fit before final assembly. How much does a custom action figure hoodie cost? DIY runs $3-8 in materials plus 2-4 hours of labor. Handmade custom pieces from independent makers run $15-25. Official licensed alternatives cost $25-45 but are frequently rigid plastic rather than cloth. How much does a full custom action figure cost? A complete custom sculpt starts around $200-300 for basic work and can exceed $500 for detailed pieces. Custom clothing for an existing figure is far cheaper — usually $15-30 per garment. What wire gauge should I use for a poseable figure hoodie? 22 AWG is the standard choice. Thicker gauges create visible bumps under thin fabric; thinner gauges won't hold a pose after a few adjustments. Why does my figure's hoodie look stiff instead of draped? Usually the fabric is too heavy for the scale. Drop to a lighter GSM (100-120 range) and check that the wire is only in the hood and sleeves, not stitched into every seam. Can I remove and reuse a wire-posed fabric hoodie on different figures? Yes, if it's sized with proper ease (2-3mm at the chest) rather than a tight fit. Tight garments snag on joints during removal and tear at the wire channel seams. Is a poseable wire hoodie worth it over a rigid plastic accessory? For photography or a display piece meant to hold a specific pose, yes. For a figure handled often or displayed somewhere dusty, a rigid accessory holds up better with less maintenance. Where can I find a properly-scaled Genos hoodie without making one myself? A ready-made option like the Genos Soft Goods Hoodie covers the fabric weight, wire placement, and handstitched seam finish discussed above, if you'd rather skip the pattern-drafting stage. Browse the wider soft goods collection or check the sizing guide if you're fitting it to a non-standard body.Is the Investment Worth Your Time?
A custom cloth hoodie for an action figure changes how the figure reads in photos. Rigid plastic versus properly-draped fabric isn't subtle once you've seen both side by side.
It's not for everyone, though. If the figure just needs to look decent on a shelf, the extra cost and upkeep aren't worth chasing. If you're doing photography or building diorama scenes where texture matters, it's close to essential.
For Genos specifically, the plain grey civilian outfit translates well to miniature scale precisely because it's simple — no prints, no hardware fighting the fabric's drape. That simplicity is also why the Genos Soft Goods Hoodie works as a reference point for the whole process, wire-in-the-right-places and all.

