


Making a haori for 1/12 action figures requires precise fabric cutting, hand-stitching sleeves, and strategic wire placement for poseable draping. The process takes 3-4 hours but transforms any basic figure into an authentic character display.
Why Standard Figure Clothes Don't Work
Most 1/12 scale clothing falls flat. Literally.
Rigid plastic accessories crack at joints. Vinyl outfits shine under photography lights like cheap Halloween costumes. Even high-end licensed figures often ship with stiff fabric that won't hold natural poses.
The problem isn't just materials — it's construction. Mass-produced figure clothing gets sewn like doll clothes, with no consideration for how fabric behaves at miniature scale. Real cloth needs internal structure to drape convincingly at 6-inch heights.
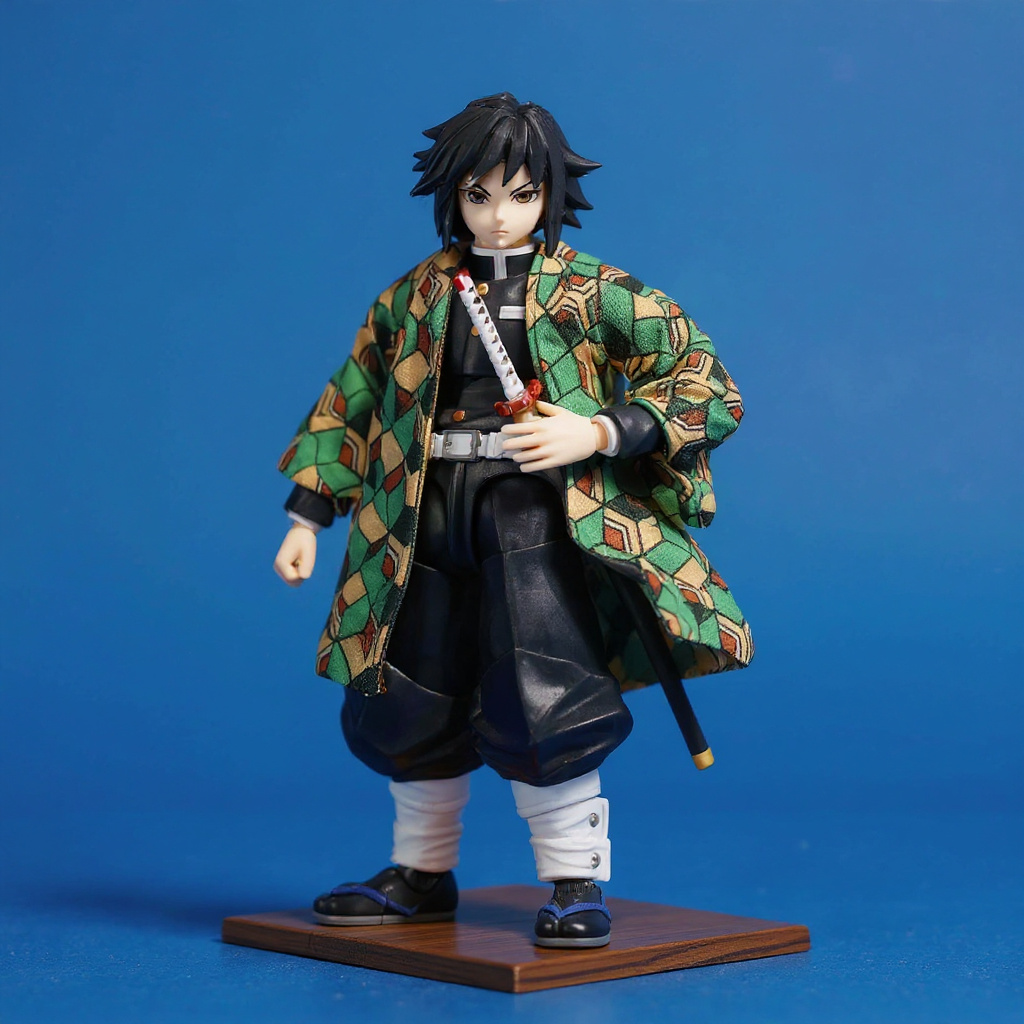
That's where handmade soft goods shine. Giyu Tomioka's character design features a distinctive checkered haori that demands fabric texture to look authentic. Getting those proportions right means understanding both sewing techniques and figure articulation.
Materials You'll Actually Need
Forget the fabric store recommendations. Here's what works for 1/12 scale:
Primary fabric: Lightweight cotton with tight weave (quilting cotton works). Avoid knits — they stretch unpredictably at small sizes. Wire: 28-gauge craft wire for sleeve edges, 30-gauge for hem details. Thicker wire creates visible bumps under thin fabric. Thread: Polyester, not cotton. Cotton thread breaks easily during repeated posing. Tools: Sharp fabric scissors (dull blades fray miniature edges), size 10 needles, seam ripper, ruler marked in 16ths. Pattern paper: Tracing paper or tissue paper. Regular printer paper is too stiff for draping tests.You'll also need a 1/12 figure for fitting. Generic action figure bodies work fine — you're not tailoring to specific joint systems.
Creating the Base Pattern
Start by measuring your figure's torso width, shoulder span, and desired sleeve length. A traditional haori extends roughly 2 inches below the figure's waist on 1/12 scale.
Sketch the basic shape on paper first:
1. Body panel: Rectangle measuring figure's chest width plus 0.25 inches for drape 2. Sleeve panels: Width should equal figure's arm length, height matches shoulder to desired cuff point 3. Collar strip: 0.5 inches wide, length equals neckline measurement plus 1 inch 4. Side panels (optional): Triangular pieces for fuller silhouette
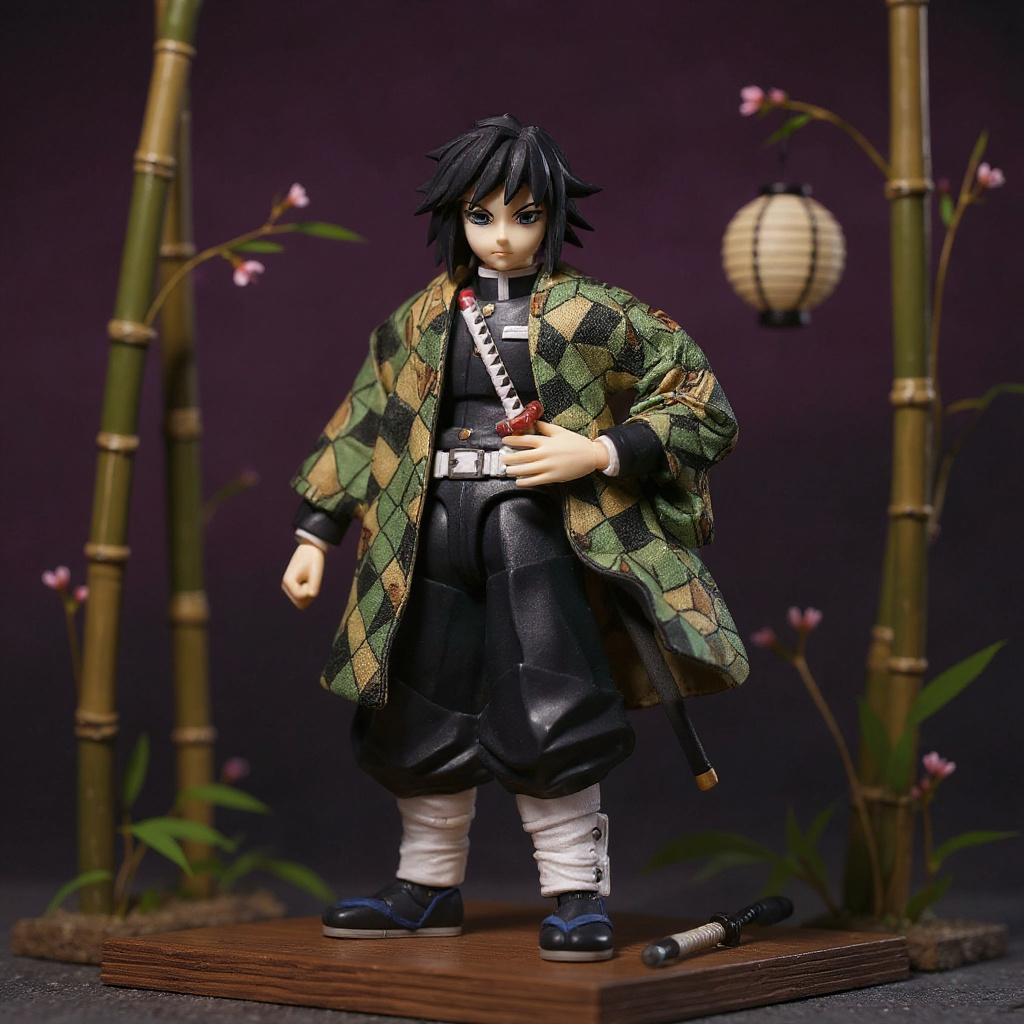
Test your pattern with cheap muslin before cutting good fabric. Pin it to your figure and check proportion. The sleeves should look naturally oversized — not tight like a modern jacket.
For Demon Slayer character accuracy, the haori needs to hang loose rather than fitted. Real kimono-style garments rely on draping, not tailored seams.
The Critical Stitching Sequence
Order matters here. Sew in the wrong sequence and you'll create seams that can't be finished properly.
Step 1: Attach collar strip to neckline with small running stitches. Keep stitches tiny — 1/16 inch maximum. Large stitches look obviously handmade in a bad way. Step 2: Join shoulder seams. Press flat (no iron needed at this scale — finger-press works). Step 3: Attach sleeves to armholes. This is the trickiest part. Gather sleeve fabric slightly to create natural puffing at the shoulder. Step 4: Sew side seams in one continuous line from sleeve cuff to hem. Don't break the seam at the armpit — that creates weak points. Step 5: Hem all raw edges with blind stitches. Visible stitching destroys the scale illusion.Each seam should use roughly 12 stitches per inch. Smaller figures demand tighter stitching than you'd use on human-scale clothing.
At this point, you'll have a basic haori shape that fits like our handmade version, but it won't pose dramatically yet. That requires the wire work.
Adding Poseable Wire Structure
Sleeve wire installation:Cut 28-gauge wire to match each sleeve's bottom edge plus 2 inches. Thread it through a narrow hem at the cuff. The extra wire length lets you twist secure loops at the ends.
Don't run wire along the entire sleeve — just the bottom 1/3. Too much wire makes the fabric stiff and unnatural.
Collar wire (optional):Run 30-gauge wire through the collar's outer edge. This lets you pose the collar standing up or laying flat against the shoulders.
Front panel wire:Some builders add wire to the front panels for dramatic wind-blown effects. I skip this — it makes the haori too rigid for natural poses.
Testing the wire placement:Put the finished haori on your figure and gently bend the wire to create folds. The fabric should hold the shape for at least 24 hours without springing back.
| Wire Gauge | Best Use | Pros | Cons |
|---|---|---|---|
| 24-gauge | Main structure | Holds shape well | Visible under thin fabric |
| 28-gauge | Sleeve edges | Good balance | Can break with heavy use |
| 30-gauge | Detail work | Nearly invisible | Won't hold dramatic poses |
| 32-gauge | Hem accents | Ultra-thin | Too weak for most uses |
Getting the Checkered Pattern Right
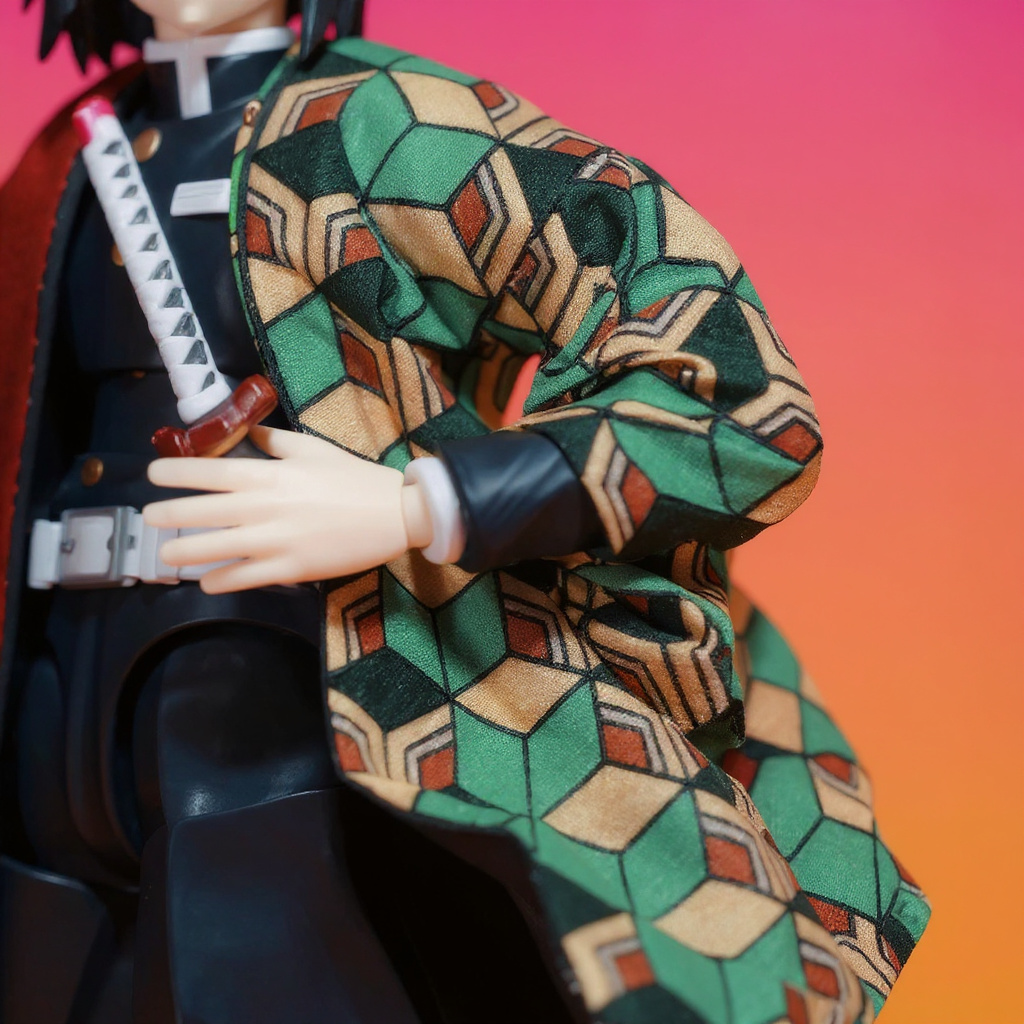
Giyu's haori uses a specific checkered pattern that's easy to mess up. The checks aren't perfect squares — they're slightly rectangular, roughly 3:2 ratio.
For 1/12 scale, each check should measure about 1/8 inch wide by 3/16 inch tall. Smaller checks look busy and lose definition in photos. Larger checks look out of proportion.
Fabric options ranked by authenticity:1. Hand-painted cotton (most accurate, most work) 2. Pre-printed gingham modified with fabric paint 3. Printed quilting cotton in dark green/black 4. Digital-printed fabric from custom services 5. Vinyl or synthetic alternatives (avoid — too shiny)
If you're painting the pattern yourself, use fabric paint thinned with textile medium. Thick paint cracks when the wire bends the fabric.
The color should be deep forest green, not emerald or lime. Black squares need true black — dark gray reads as faded under photography lights.
Many collectors on action figure forums obsess over pattern accuracy, and they're right to. Getting the proportions wrong immediately signals "homemade costume" instead of "custom figure."
Fitting and Final Adjustments
Even perfect measurements need tweaking once you see the haori on the figure.
Common fit issues:- Sleeve length: If sleeves extend past the figure's fingertips, trim from the shoulder end, not the cuff. This preserves the wire placement. - Shoulder width: Too narrow and the haori looks like a vest. Too wide and it overwhelms the figure's proportions. - Hem length: Should hit roughly mid-thigh on most 1/12 figures. Longer looks like a bathrobe. - Collar gap: The front panels should overlap slightly when closed, not meet edge-to-edge.
Posing tips for photography:The wire lets you create dynamic wind-blown effects, but subtlety works better than extreme bends. Gentle curves look natural. Sharp angles look broken.
For display poses, position one sleeve slightly forward and one back. This creates visual depth and shows off the wire's shaping capability.
Avoid poses where the wire creates obvious lumps under the fabric. If you can see the wire's outline, the pose is too extreme.
What About Store-Bought Alternatives?
Honest talk: making your own haori takes 3-4 hours plus materials cost around $8-12. Is it worth it?
Depends on what you want. Basic fabric haori without wire sell for $15-25 but look flat in photos. Higher-end versions with internal structure run $35-60.
The advantage of handmade is customization. You control every detail — pattern accuracy, wire placement, fabric choice. The disadvantage is time investment and the learning curve for miniature sewing techniques.
I've seen beautiful custom work from Demon Slayer fans who spent weeks perfecting their techniques. I've also seen rushed attempts that look worse than leaving the figure in its default outfit.
If you're making one haori, buying might make more sense. If you're planning multiple figures or enjoy the crafting process, DIY pays off.
Troubleshooting Common Problems
Fabric frays during handling: Seal raw edges with clear nail polish before cutting. Let it dry completely, then cut through the sealed area. Wire pokes through seams: File wire ends smooth and fold them into small loops. Sharp ends will eventually work through any fabric. Proportions look wrong on different figures: Not all 1/12 figures are built the same. Some have heroic proportions (oversized chest/shoulders), others are more realistic. Test your pattern on multiple body types if you plan to make several. Colors don't match reference images: Monitor calibration affects how you see colors. Check your fabric under daylight bulbs, not warm household lighting. Seams show in photographs: Use thread that matches your fabric exactly. "Close enough" becomes obvious under camera flash. Fabric won't hold poses: Your wire is probably too light. Try 26-gauge for more holding power, but be prepared for slightly visible lines under the fabric.These problems are fixable, but prevention works better than correction.
Your Next Steps
Making haori for action figures bridges the gap between collecting and crafting. Done right, handmade soft goods can rival licensed accessories at a fraction of the cost.
The techniques transfer to other character outfits too. Once you've mastered wire placement and miniature seaming, you can tackle more complex designs.
But if you'd rather skip the learning curve and get straight to posing, our Giyu Tomioka haori offers the same wire-poseable construction without the 4-hour time investment. At $34, it sits right in the sweet spot between basic fabric versions and premium licensed accessories.

