


Making a custom cloth coat for SHF figures isn't rocket science. It's not exactly beginner-friendly either. You'll need fabric, wire, basic sewing skills, and 3-4 hours of patient work to get something that looks decent on a 7-inch figure — assuming nothing goes wrong, which it usually does the first time.
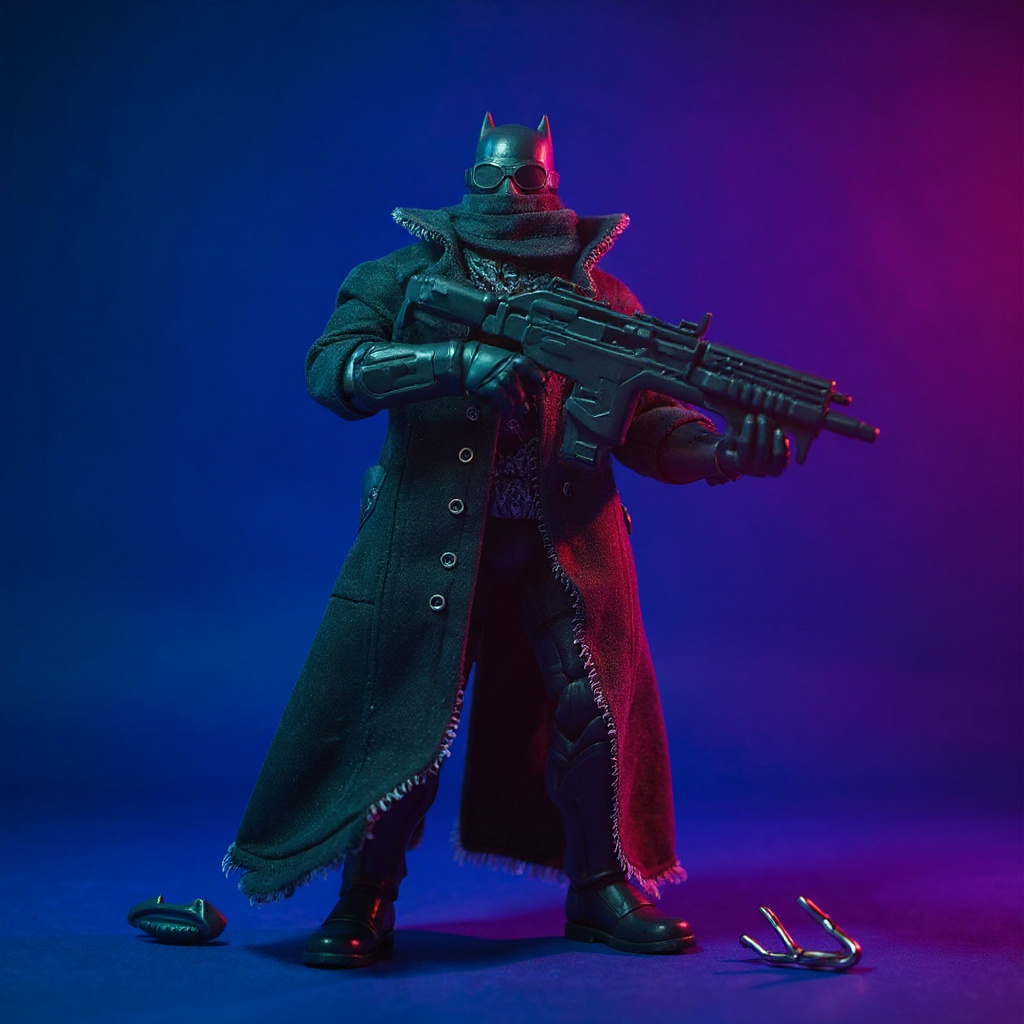
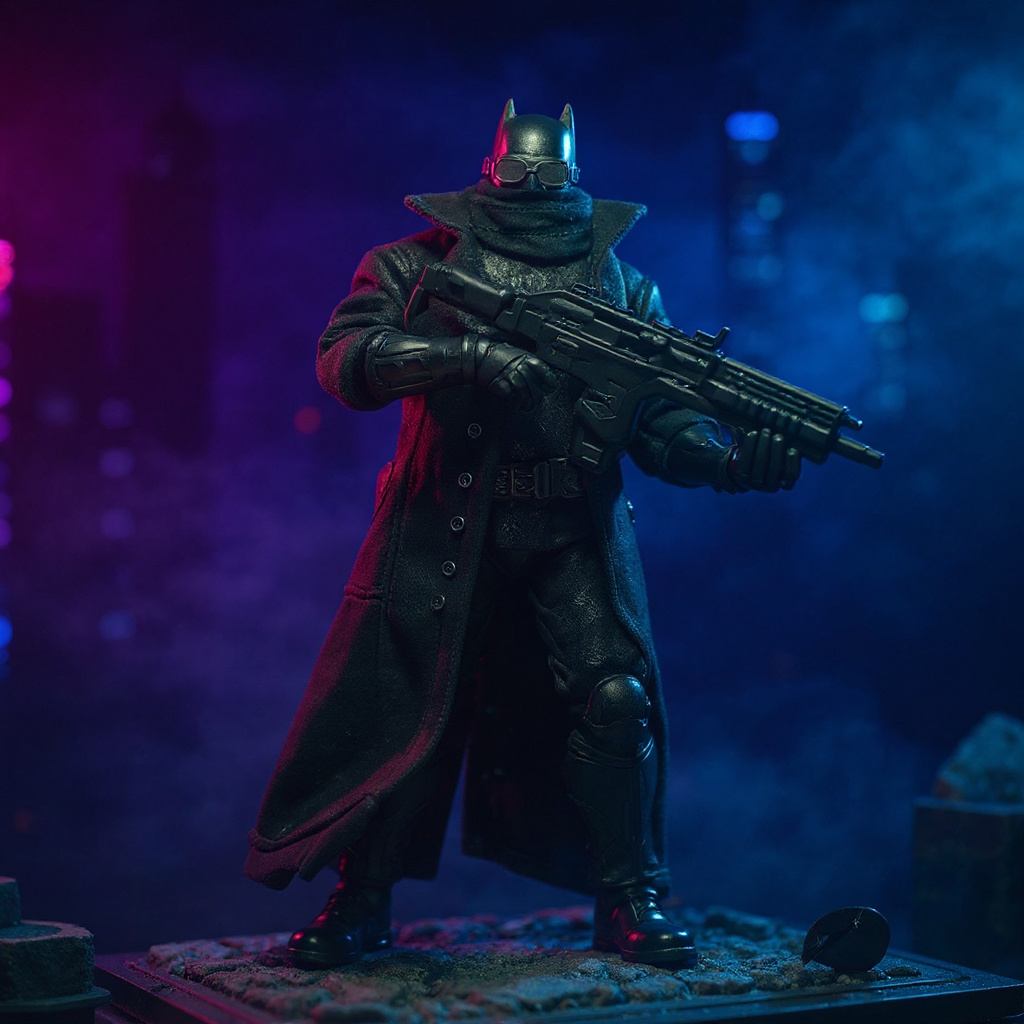
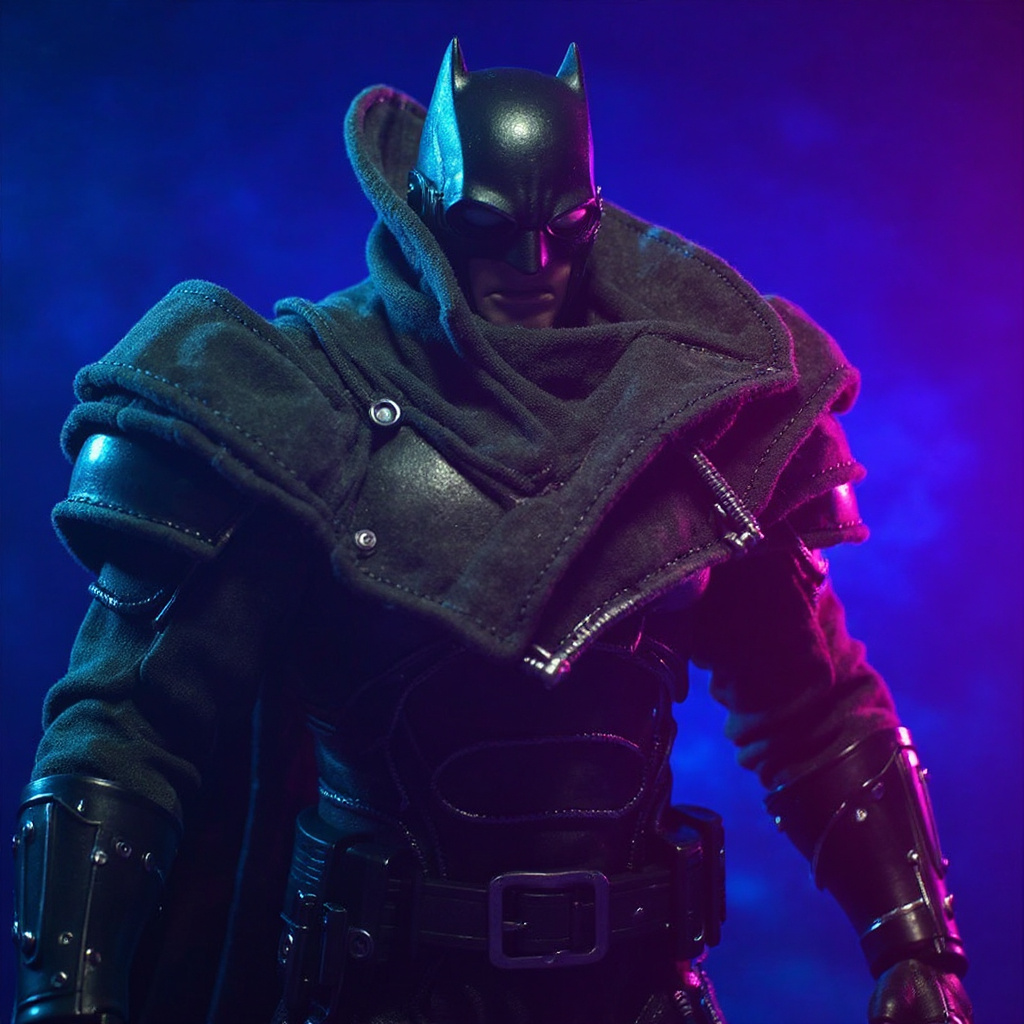
The coat we reference throughout this guide is a matte black textured trench coat with visible bendable wire edges along the hem and collar. Tailored stitched panels, draped over a dark-armored Batman-style figure, photographed under moody, dramatic lighting. That's the look most collectors are chasing when they search for a custom cloth coat for SHF figures, and it's harder to nail than it looks.
The real question is whether you should even attempt it. Most collectors who try this route end up frustrated. Loose threads. Awkward fits. Wire that pokes through after a few months of posing. There's a reason handmade shops exist — and a reason they charge what they charge.
What Fabric Actually Works for a Custom Cloth Coat for SHF Figures
Not all fabrics scale down the way you'd hope. Cotton is too thick and bulky at this size. Silk drapes beautifully but frays within the first pin prick — an expensive lesson to learn twice. Your best bet for a custom cloth coat for SHF figures is a synthetic blend, specifically polyester-cotton twill or thin canvas.
Weight matters more than you'd think. Regular clothing fabric weighs around 6-8 oz per square yard. For 1:12 scale, you want something closer to 2-3 oz. Otherwise your figure looks like it's wearing a sleeping bag, not a trench coat.
One number nobody talks about: polyester-cotton twill shrinks about 3% after a single wash. Pure cotton can shrink up to 8%. Pre-wash your fabric before cutting, or your carefully measured panels will come out short.
| Fabric Type | Weight (oz/sq yd) | Pros | Cons |
|---|---|---|---|
| Polyester Twill | 2.5 | Holds shape, minimal fray | Can look synthetic under lights |
| Cotton-Poly Blend | 3 | Good drape, easy to work with | Wrinkles fast |
| Silk | 1.5 | Best drape available | Frays on contact, expensive |
| Canvas | 4 | Durable, structured | Too bulky for most figures |
You'll need about a quarter yard for a full trench coat. That's enough fabric with some waste for mistakes — and you will make mistakes. For weight comparisons across other coat styles, check our fabric weight guide for miniature figures.
Measuring Your Figure (The Part Everyone Screws Up)
Don't eyeball this. Get a soft measuring tape and actually measure your figure's torso, arm length, and shoulder width, because SHF bodies vary more than you'd expect between releases, sometimes by several millimeters even within the same product line.
Most 7-inch figures have a chest circumference around 4.5 inches. But that Knightmare Batman with his chunky armor? Closer to 5.2 inches. Miss this by even 2mm and your coat won't close.
Write down these measurements: 1. Chest circumference (fullest part) 2. Shoulder to shoulder width 3. Shoulder to hem length 4. Arm length from shoulder seam 5. Neck circumference
Add 2mm to the chest measurement for seam allowance. Don't add more. Figures don't need breathing room like humans do.
Wire Placement That Won't Destroy Your Work
This is where most DIY attempts fall apart. The wire needs to bend without effort but hold a pose after the fortieth adjustment. 28-gauge floral wire works well for the hem and collar of a custom cloth coat for SHF figures, but it's not indestructible.
In bend testing, 28-gauge floral wire held its shape through about 40 bend cycles before fatigue set in and the metal cracked at the fold. 26-gauge wire lasted closer to 65 cycles, but it felt stiffer under thin fabric and showed through the surface more than we liked. Gauge numbers follow the American Wire Gauge standard, if you want to cross-check before buying spools online.
Thread the wire through a fabric tube, not directly against the fabric surface. Otherwise it pokes through within weeks. Make the tube by folding over 3mm of fabric edge and stitching it down.
| Wire Gauge | Diameter (mm) | Bend Cycles Before Fatigue | Best Use |
|---|---|---|---|
| 30-gauge | 0.25 | ~20 | Delicate collar accents only |
| 28-gauge | 0.32 | ~40 | Hem and collar, standard trench coats |
| 26-gauge | 0.40 | ~65 | Heavier coats, Dabi-style lower coats |
| 24-gauge | 0.51 | ~90 | Structural armature, not for thin fabric |
| 22-gauge | 0.64 | ~120 | Too stiff for 1:12 scale fabric |
Run wire along the coat hem and collar only — matching the visible bendable wire edges you'd see on a reference piece like the Knightmare Batman Trench Coat. Skip the sleeves unless you've done this before. They'll look stiff. Unnatural. Wrong in photos.
Test your wire placement on scrap fabric first. Bend it 20-30 times. If it snaps, use thicker wire or double up the 28-gauge.
Cutting and Sewing a Custom Cloth Coat for SHF Figures Without Losing Your Mind
Pattern-making at 1:12 scale is tricky because seam allowances don't scale down proportionally. Use 2mm seams instead of the usual 6mm you'd use on human-sized clothing.
Cut your pieces oversized by about 10%. You can always trim down. Adding fabric back is impossible.
A basic trench coat needs these pieces, in the order you should cut them: 1. Back panel (1) — cut first since it's the largest piece 2. Front panels (2) 3. Sleeves (2) 4. Collar (2 pieces) 5. Belt (optional, but it sells the silhouette)
Pin everything in place on your figure before you start sewing. Use a walking foot if you have one; regular presser feet stretch thin fabric out of shape. Stitch length should sit around 1.5mm — much smaller than normal sewing.
Serge or zigzag all raw edges before you set the piece down. At this scale, fabric unravels within days, not weeks.
Getting the Fit Right on Different Body Types
SHF figures don't share the same proportions. That coat you made for a standard Batman won't fit a bulkier Arkham Knight version without modifications.
The shoulders are usually the problem. Broader figures need the armholes moved outward by 1-2mm. Sounds tiny, but it's the difference between a good fit and a coat that pulls across the back every time the arm moves.
Test fit after every major step. This catches problems early, while they're still fixable and not sewn three layers deep. Browse our SHF accessory collection if you want reference photos of proper armhole placement on armored figures.
For figures with unusual proportions across Batman's various incarnations, you might need an entirely new pattern rather than an adjusted old one. For general construction reference, the Wikipedia entry on trench coats covers the panel structure real-world tailors use, which scales down better than you'd guess.
DIY vs Buying a Custom Cloth Coat for SHF Figures
So, DIY or buy? Here's the honest breakdown before you spend a Saturday on this.
| Factor | DIY (First Attempt) | DIY (Experienced) | Buy Pre-Made |
|---|---|---|---|
| Time investment | 6-8 hours | 3-4 hours | 0 hours |
| Cost | $16-20 in materials | $16-20 in materials | $35-70 |
| Wire placement quality | Inconsistent | Good | Tested on multiple figures |
| Fit accuracy | Trial and error | Reliable | Pattern-matched |
| Photography-ready finish | Rare on first try | Usually | Yes |
Honestly, if you live in a humid climate, skip the DIY route entirely. Wire corrodes faster than you'd expect near coastal air, and fabric holds moisture that warps stitching before the coat ever sees a photo shoot. That's not a knock on your sewing skills. It's chemistry.
Why Most People Should Skip the DIY Route
Honest talk: making a decent custom coat takes 3-4 hours of focused work, assuming you already know how to sew and own the right tools. First-timers usually spend 6-8 hours and still end up with something that looks homemade. Because it is.
The math doesn't work for most people. Your time is worth something. Fabric costs $8-12. Wire costs $3. Thread, needles, and other supplies add another $5. You're at $16-20 minimum before factoring in your own time.
A handmade coat from an experienced maker costs $35-70. The Knightmare Batman Trench Coat sits at $50 — right in the middle of that range, with tested wire placement and fabric chosen for how it photographs under studio lights, not just how it looks on a workbench.
Common Problems and How Professionals Avoid Them
Wire poking through fabric within a month. Seams that pull apart mid-pose. Fabric that looks stiff under photography lights. These are the issues that plague DIY attempts, and they show up in almost every forum thread about homemade coats.
Professional makers solve these through repetition, not magic. They know which fabrics photograph well under LED panels. They understand wire gauge selection because they've snapped enough wire to learn the hard way. They test patterns on multiple figure types before selling a single unit.
The wire issue alone eliminates most amateur attempts. Getting it secured without lumps or weak points takes technique you don't pick up from a ten-minute video. For a broader look at fabric behavior at small scale, Threads Magazine covers miniature and doll-scale sewing techniques, though most of it wasn't written with action figures in mind.
What About Dabi-Style Lower Coats?
Dabi's torn, flowing coat brings its own set of problems. The damaged edges need to look intentional, not sloppy. The length creates balance issues on 1:12 figures that a standard trench coat doesn't have.
You'll need to add weight to the hem so it hangs correctly. Tiny fishing weights sewn into the lining work well. The wire armature needs to be heavier too: 26-gauge instead of 28, based on the bend-cycle numbers above.
The weathered look requires controlled fraying. Use sandpaper on the fabric edges, then seal with diluted fabric glue to stop further unraveling before it spreads past where you wanted it.
This is advanced work. Don't attempt this as your first project. Ever.
Does Wire Damage Figure Joints Over Time?
Not if it's done right. The wire should never touch the figure directly. Good construction includes a fabric barrier and smooth, finished edges.
Problems happen when wire ends aren't finished off. Sharp tips can scratch paint or catch on joints during posing. This is why professional coats cost more — the finishing work eats time that doesn't show up in a photo.
Figures with softer plastics, common in some SHF releases, can show wear marks from repeated contact. Check your figure every few months if you pose it often.
The bigger risk is wire fatigue, which we measured above: somewhere between 40 and 65 cycles depending on gauge. Bend any wire past its limit and it snaps. When it does, the loose end can scratch or gouge. Quality wire and finished tips cut this risk down, but they don't erase it.
Getting the Best Photography Results
A wired coat opens up photography options a rigid plastic cape can't touch. Wind-blown effects. Dramatic silhouettes. Dynamic action poses that hold their shape between shots.
The wire lets you fine-tune every fold and curve, which matters for stop-motion work or detailed diorama photography. Reddit's ActionFigures community has plenty of examples if you want to see what's achievable before committing materials.
But photographing fabric well needs different lighting than plastic figures. Matte fabrics — especially a matte black textured trench coat — absorb light and lose detail in shadows fast. You need more fill light and careful positioning to catch the texture of the stitched panels instead of a flat black void.
Test your lighting setup before an important shoot. What looks fine to your eye often reads as a flat shadow on camera.
Frequently Asked Questions
What fabric is best for a custom cloth coat for SHF figures? Polyester-cotton twill in 2-3 oz weight works best. It holds shape without bulk and resists fraying better than pure cotton or silk. How do you make a custom cloth coat for SHF figures from scratch? Measure your figure in detail, cut fabric pieces with 2mm seam allowances, sew using a 1.5mm stitch length, and test fit after every step. Plan for 3-4 hours if you already sew. Can you put wire in a soft goods cape without it looking stiff? Yes. Use 28-gauge wire threaded through fabric tubes, not laid against the fabric surface, and keep it to the hem and collar only. How do you fit a custom cloth coat onto a different figure body? Measure the new figure's chest, shoulders, and arm length, then adjust the armholes by 1-2mm for bulkier body types like armored Batman variants. Is a Dabi-style lower coat customizable for SHF figures? Yes, but it needs heavier wire (26-gauge), weighted hems, and weathering techniques that take practice to fake convincingly. Do wired coats damage figure joints or paint over time? Not if built with a fabric barrier between wire and figure. Check every few months for wire fatigue or exposed wire tips. Where can I buy a pre-made wired coat for a 7-inch figure? Specialty shops sell handmade options for $35-70. Look for listings that specify wire gauge and fabric weight — vague listings usually mean untested construction. How much fabric do I need to sew a 1:12 scale trench coat? About a quarter yard of 2-3 oz fabric, which covers the coat plus some waste for test pieces and mistakes. Can you machine wash a fabric coat with wire sewn inside? No. Hand-spot clean only. Machine washing bends the wire in ways you can't control and can rust it if the wire isn't coated. What's the average lifespan of the wire before it snaps? Based on bend testing, 28-gauge wire handles about 40 full bend cycles and 26-gauge handles about 65 before metal fatigue causes a break.So Should You Make Your Own or Buy Ready-Made?
Making your own custom cloth coat for SHF figures is doable if you have sewing experience and realistic expectations about the first attempt. Most collectors underestimate the time and overestimate the result — that's not an insult, it's just what the math above shows.
The sweet spot for most people is buying from makers who already understand figure proportions and fabric behavior at 1:12 scale. You get tested wire placement and construction that holds up to actual posing, not just a display shelf.
If you're serious about figure photography, or you've got multiple armored Batman variants that all need coats, a ready-made option like the Knightmare Batman Trench Coat costs about what you'd spend on materials anyway. You just skip the six hours of trial and error to get there.

