


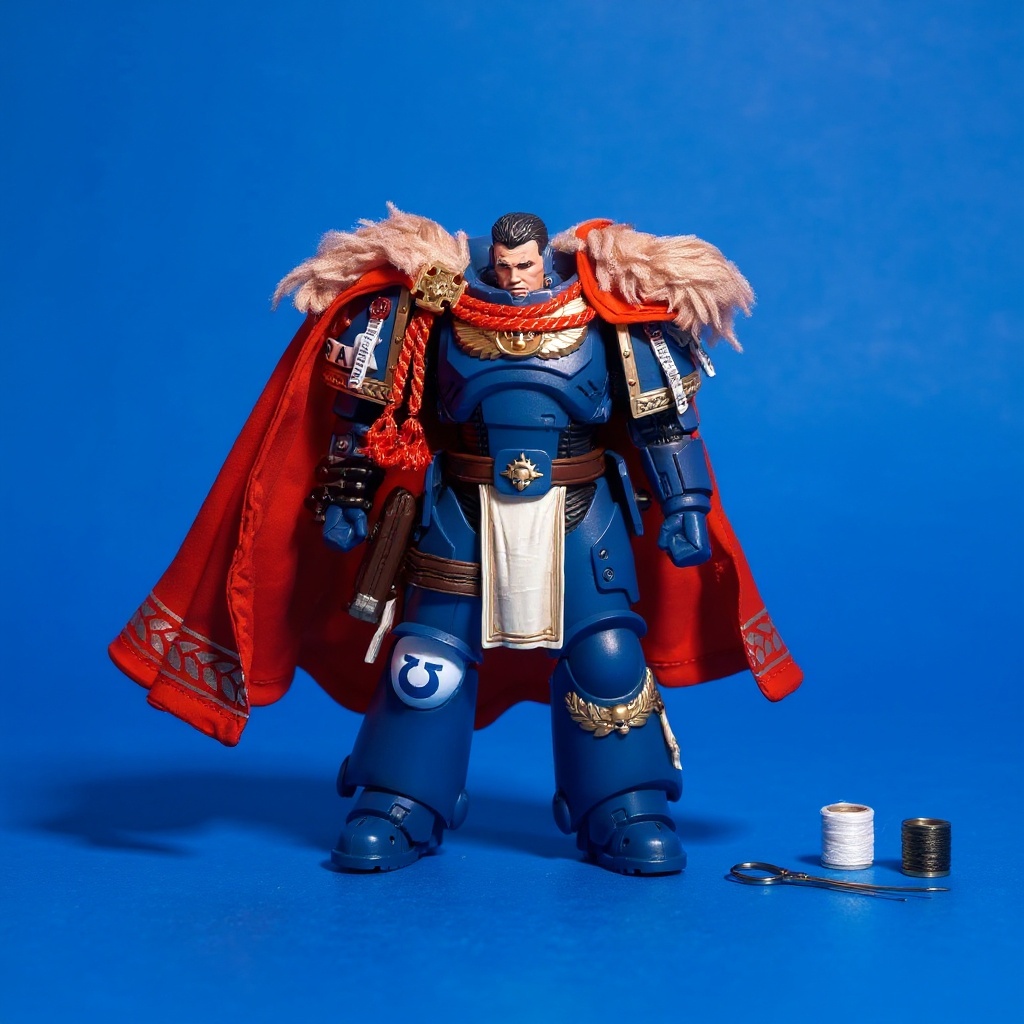
A DIY cloth cape for action figures needs three things to work at 1/18 scale: fabric thin enough to drape naturally, 22-gauge wire in the hem, and hand-stitched seams instead of machine ones. Get those three right and you'll outperform the stock plastic cape that shipped with your figure. Get them wrong and you'll end up with something that looks like a dish towel glued to a shoulder peg.
Most collectors try this once. The plastic cape that comes with a Captain Titus or similar armored figure looks fine sitting on a shelf, but it cracks under dynamic posing, doesn't flow, and kills your photography options. A wire-reinforced cloth cape fixes all three problems. Only if you execute it right, though.
How to Make a DIY Cloth Cape for Action Figures: Materials That Actually Work
Fabric choice makes or breaks a DIY cloth cape for action figures. You need something thin enough to look proportional at 4 inches tall, but not so thin it frays apart after two posing sessions.
Cotton poplin works for most builds. It holds a fold without turning stiff, and it doesn't shred the way muslin does after repeated handling. Heavy fabrics like canvas will swallow a small figure whole — skip those. Silk looks incredible under macro photography, but a single yard can cost more than the figure it's dressed on.
| Fabric Type | Cost per Yard | Pros | Cons | Best For |
|---|---|---|---|---|
| Cotton poplin | $8–12 | Holds folds, easy to hand-stitch | Limited color range | First attempts, armored figures |
| Silk chiffon | $25–40 | Realistic flow, premium sheen | Frays fast, hard to control | Display pieces, not handling |
| Polyester crepe | $6–10 | Resists wrinkles, wide color range | Reads as synthetic under light | Superhero-style capes |
| Linen blend | $15–20 | Natural texture, ages with character | Wrinkles badly, tough to sew | Weathered or battle-worn looks |
| Cotton muslin | $4–7 | Cheapest option, good for testing patterns | Frays within weeks | Practice runs only |
For the wire frame, 22-gauge craft wire is the sweet spot for a DIY cloth cape for action figures at this scale. It bends into a pose and stays there through dozens of adjustments. 20-gauge fights you every time you try to reshape it. 24-gauge collapses under the fabric's own weight after a few pose changes — I learned that one the hard way on a batch of six capes that all sagged within a week.
You'll also need matching thread, fabric scissors, needle-nose pliers, and a basic sewing kit. Total cost, buying everything new: $15–25.
The Step-by-Step Process (And Where It Goes Wrong)
Measure your figure's shoulder width and desired cape length first. Most 1/18 scale figures need a cape between 2.5 and 3 inches long. Anything longer drags the ground and looks like a bathrobe.
Cut your fabric as a half-circle or full circle, depending on how dramatic you want the flow to read in photos. Add 0.25 inches on all sides for seam allowance. This step is where most attempts fall apart — people eyeball the cut, and the resulting cape never sits flush against the shoulder.
Here's the wire installation sequence:
1. Cut wire 2–3 inches longer than the hem circumference 2. Loop each wire end small and tight, so no sharp point pokes through the fabric 3. Fold the hem over the wire, leaving slack so the wire can shift inside the channel 4. Hand-stitch the hem closed with stitches spaced roughly 1/8 inch apart 5. Test wire tension by bending the hem into three different poses before final assembly 6. Attach the cape to the figure's shoulder points 7. Shape the wire into folds that follow gravity, not against it
Attachment hardware depends on the figure. Some have molded cape slots. Others need a tiny magnet or snap glued behind the shoulder plate. For Warhammer 40,000 figures like Captain Titus, you're usually working with a shoulder peg that the cape loop slides over.
Why Most DIY Cloth Capes for Action Figures Look Terrible
I've read through dozens of cape attempts on r/ActionFigures and r/Warhammer40k. Maybe one in ten looks like it belongs on a display shelf rather than a craft table.
The biggest mistake is scale. People grab fabric that reads fine in their hands but looks like sheet metal once it's on a 4-inch figure. A cape that drapes well on a 12-inch action figure will look armored and stiff at 1/18 scale — the proportions just don't transfer.
Second mistake: wire placement fighting the fabric instead of working with it. If you force the wire into a curve the cloth wouldn't naturally settle into, it looks fake under any lighting that isn't diffused to death.
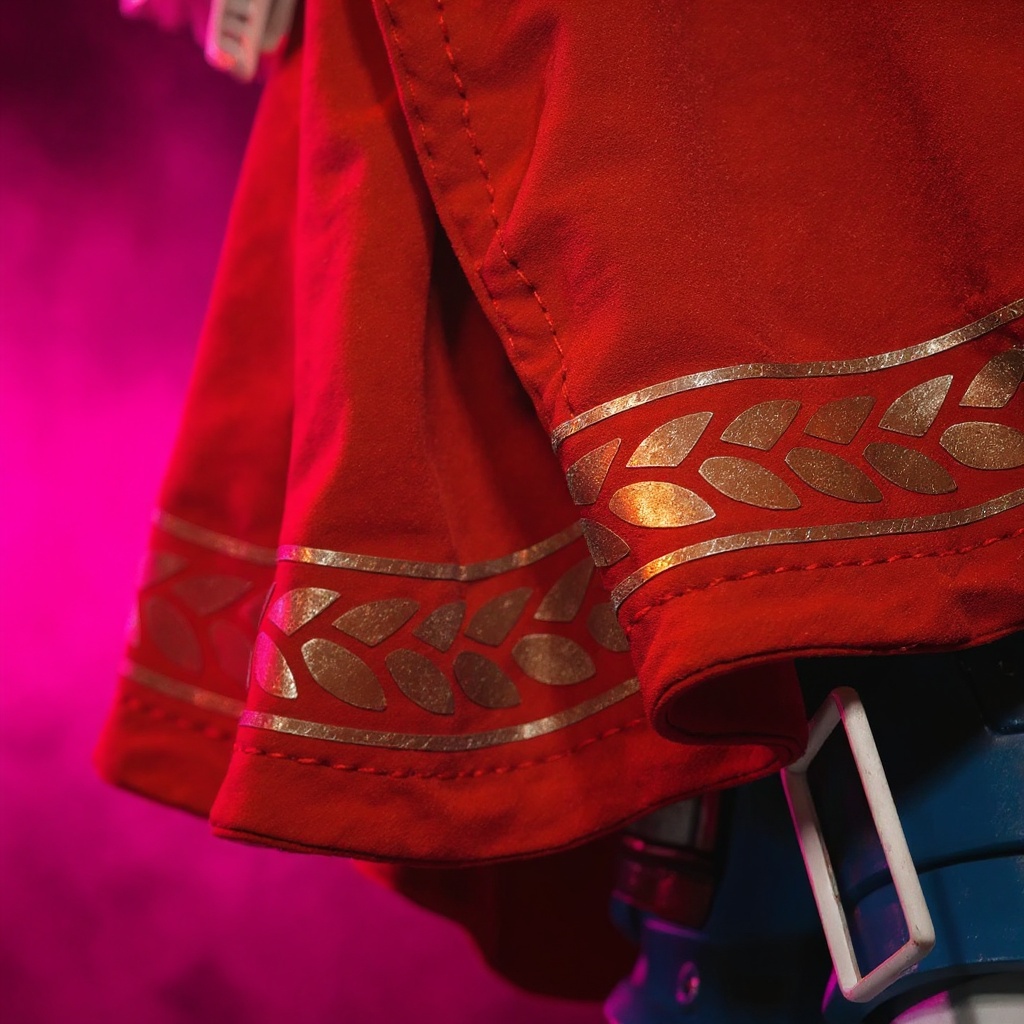
Thread tension trips people up too. Loose stitches let the wire slide around inside the hem. Tight stitches pucker the fabric into little ridges that show up under macro lenses. Hand-stitching gives more control than a machine here, but it takes real practice — expect your first three attempts to look rougher than you want.
Color matching under lights is its own trap. That crimson fabric that looked deep and rich in the store can shift orange or pink under a softbox. Test your fabric swatch under your actual photography lighting before you cut anything.
Honestly — if you're only shooting for social media at normal viewing distance, skip the wire reinforcement entirely. A plain fabric drape without wire looks close to identical unless someone's zooming in on a macro shot. Save the wire work for pieces you're photographing up close or posing dynamically.
When Handmade Beats a DIY Build
Some collectors have the patience for this. Most don't, and there's no shame in that.
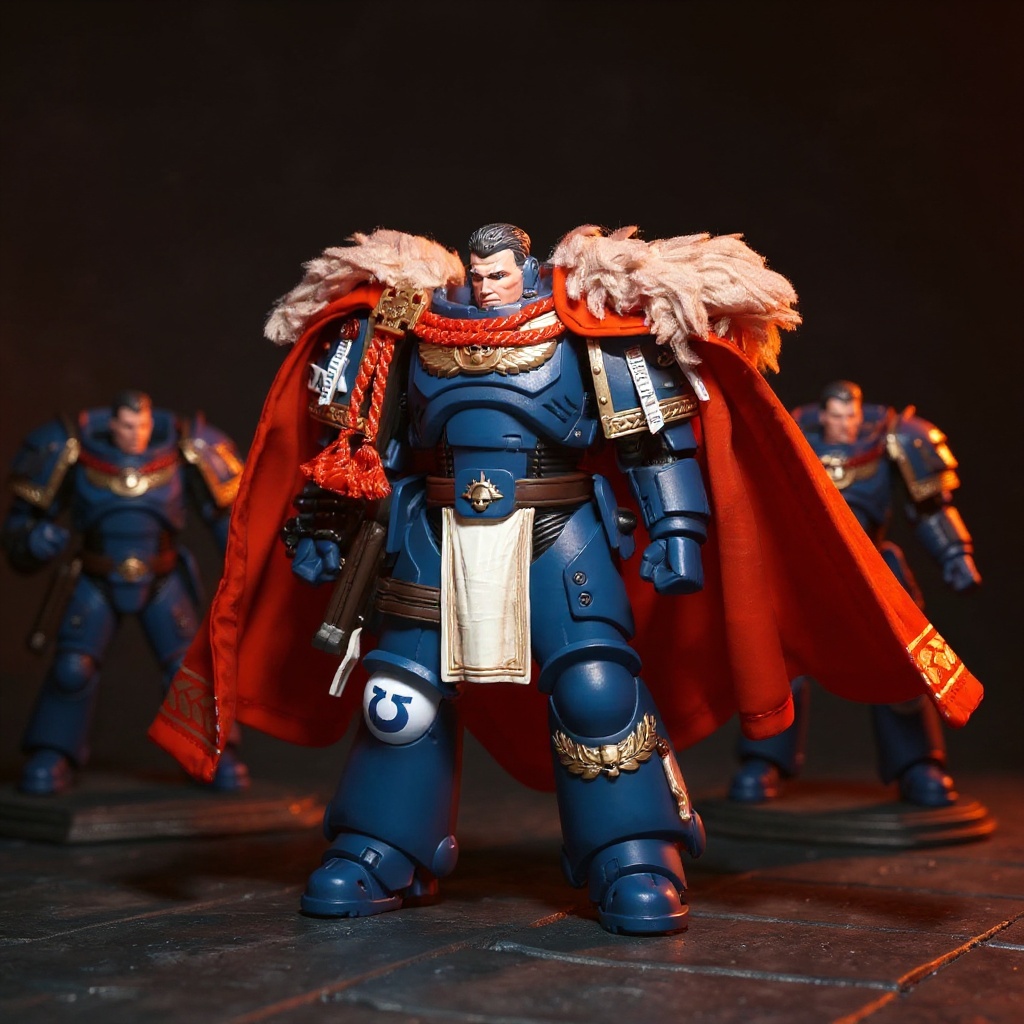
A finished piece like our 1/18 Scale Titus Cape Replacement runs $24 — roughly what you'd spend on materials for one DIY attempt, minus the three failed attempts before it. It's a small dark crimson cape with visible natural fabric folds, a bendable wire-reinforced hem, and hand-stitched seams, built to hold a pose against a neutral or diorama backdrop without the wire showing through the cloth. The gauge is tuned for repeated posing rather than a single photo shoot.
Browse the full 1/18 scale cape collection if you're outfitting more than one figure, or check this wire-gauge breakdown if you want the technical reasoning behind the 22-gauge choice.
DIY still makes sense if you want multiple colors, or if the process itself is the point. For a one-off project where you just want it done, buying handmade is often the better math.
Photography Tips for Cloth Capes on 1/18 Scale Figures
Cloth capes change figure photography completely, but they need different handling than plastic accessories.
Diffused light shows texture and fold depth. Harsh direct light flattens everything and makes cheap fabric look cheaper. Position your figure at roughly 45 degrees to your main light source — this builds depth into the cape's folds without blowing out highlights. A white card or small reflector on the opposite side fills in shadow without erasing it.
Wire-reinforced capes hold a pose, but overdo the shaping and they look frozen. Real fabric doesn't form a perfect curve. Add irregularity to your wire bends on purpose.
Dust collects on fabric fast — faster than plastic, no contest. A soft brush or a short burst of compressed air from 6 inches away handles most of it. Skip liquid cleaners unless you've tested them on a scrap first; some dyes bleed the moment they get damp.
Maintenance and Durability Reality Check
Cloth capes need more upkeep than plastic ones. They snag, they collect dust, and the wire fatigues eventually.
Good 22-gauge wire holds up through 50–100 pose changes before it starts to soften. Cheap wire from a bargain craft pack might give you 20–30 before it goes limp. That's the real reason wire gauge matters — not looks, longevity.
Natural fibers like cotton and silk age with character but tear more easily. Synthetic blends resist wear but can look plasticky under close inspection. Pick your trade-off based on whether the cape will get handled often or mostly sit in a display case.
Don't leave a cape frozen in one dramatic pose for months. The wire develops a permanent bend, and you'll fight it every time you try to reset the shape. Keep capes dust-free, out of direct sunlight if the dye isn't colorfast, and handled with clean hands.
Most handmade cloth capes last 2–3 years of regular handling before the wire or stitching needs redoing. That outlasts most collectors' display setups anyway.
What I'd Actually Recommend
For a first attempt, modify an existing cape instead of starting from raw fabric. A cheap fabric cape from AliExpress ($8–12) with an upgraded wire hem and better stitching teaches you the technique without wasting good material.
If you're set on full DIY, start with a simpler figure. Superhero capes forgive mistakes better than armored or medieval styles — the shapes are simpler, and small errors read as intentional wear.
For collectors who want results today, a finished 1/18 Scale Titus Cape Replacement skips the learning curve entirely. The $24 price covers materials, the labor, and the trial-and-error you'd otherwise have to burn through yourself.
Don't try to redo your whole collection at once. Pick one or two figures, get comfortable with the technique, then decide if it's worth scaling up.
Frequently Asked Questions
How do you make a DIY cloth cape for action figures? Cut fabric in a half-circle pattern sized to 2.5–3 inches for 1/18 scale, install 22-gauge wire in the hem with a stitch spacing of about 1/8 inch, and attach the cape to the figure's shoulder points. Test the wire in three poses before calling it finished. How do you make a DIY superhero cape for a figure? Use a full circle cut for dramatic flow, bright polyester crepe for the synthetic costume look, and skip realistic fabric texture in favor of a clean silhouette. Superhero capes tolerate more error than military-style ones. How do you dust a cloth cape on an action figure? A soft-bristled brush or a 2-second burst of compressed air from about 6 inches away removes most surface dust. For fabric that's collected grime over months, remove the cape and spot-test a liquid cleaner on an inside seam before using it anywhere visible. What is the best fabric for a DIY cloth cape for action figures? Cotton poplin for a first build, silk chiffon if you want premium flow and don't mind the higher fray risk. Avoid canvas or denim — both overwhelm a 4-inch figure. Test the color under your actual photo lights before you cut. Has anyone actually used a wired cape like this on their figures? Yes — wire-reinforced cloth capes show up regularly in figure photography threads on r/ActionFigures, usually alongside macro shots showing the fold detail a plastic cape can't replicate. Does a wired cape work for a Vader-style figure? It works, and arguably works better than on most other figures, since Vader poses lean into dramatic flow. Black silk or polyester crepe with a 22-gauge hem gets close to the screen look. Can you put a custom cloth cape on a Marvel Legends Dr. Doom figure? Most 6-inch figures accept a custom cape with some modification to the attachment method. Dr. Doom figures typically use cape holes or shoulder pegs, both of which work fine with a hand-stitched hem loop. How long does a hand-stitched wire hem actually last before it needs repair? Expect 50–100 pose changes from 22-gauge wire before it softens, versus 20–30 from bargain-bin wire. The stitching itself usually outlasts the wire by a wide margin if it was tied off correctly. Is a DIY cloth cape for action figures actually cheaper than buying handmade? Only if you already own the tools and don't count your time. Materials alone run $15–25, close to the $24 price of a finished replacement — the real cost of DIY is the two or three failed attempts most people go through first. Can I skip the wire entirely and just use fabric? Yes, for figures that stay in one pose. A wireless drape looks nearly identical to a wired one at normal photo distance. Save the wire work for figures you're actively reposing or shooting close-up.The Real Bottom Line on DIY Cloth Capes for Action Figures
Making a poseable cloth cape is doable. It is not a weekend project, not on the first try. Material costs, the learning curve, and the time sunk into failed attempts add up faster than most people expect. Some collectors get hooked and turn it into a real hobby. Others try it once, decide it's not worth the aggravation, and buy handmade instead. No shame either way.
If you want to upgrade a specific figure without the DIY commitment, browse the 1/18 Scale Titus Cape Replacement or the full 1/18 scale cape collection to see what a properly built hand-stitched cape looks like against a diorama backdrop. Sometimes the smarter move is knowing when to let someone who's already burned through the failed attempts do it for you.

