


I've sewn and rewired something like 60 capes over eight years of customizing 1/10 and 1/12 scale figures — NECA, Storm Collectibles, a few resin garage kits that had zero soft goods at all. Wired soft goods for figure customization is the technique that finally let me stop fighting gravity and start posing fabric like a sculptor poses clay.
The idea is simple. Thin, bendable wire gets sewn into fabric edges. It holds whatever shape you give it. That's it. No magic, just metal doing what cloth alone can't.
Most factory capes hang straight down or flop with the slightest breeze from a ceiling fan. Wire-embedded fabric stays exactly where you position it — mid-billow, dramatic swirl, windswept angle, whatever your diorama needs. When I wired a 1/10 NECA cape two winters ago for a photo shoot, I spent maybe twenty minutes shaping the hem into a frozen gust before I got a pose I actually liked. Twenty minutes. That's the whole trade-off: a little patience for a lot of control.
Why Wired Soft Goods for Figure Customization Beat Plastic
The wire is an internal skeleton. Without it, fabric accessories rely on gravity and weight alone, and that means your figure's cape either hangs limp or needs invisible display supports to fake movement.
Thin gauge wire, usually 20-22 AWG, runs through sewn channels along hems and key fold lines. You bend it into curves, spirals, sharp angles — shapes cloth cannot hold on its own, not for five minutes, let alone five years on a shelf. The wire keeps that position until you decide to reshape it.
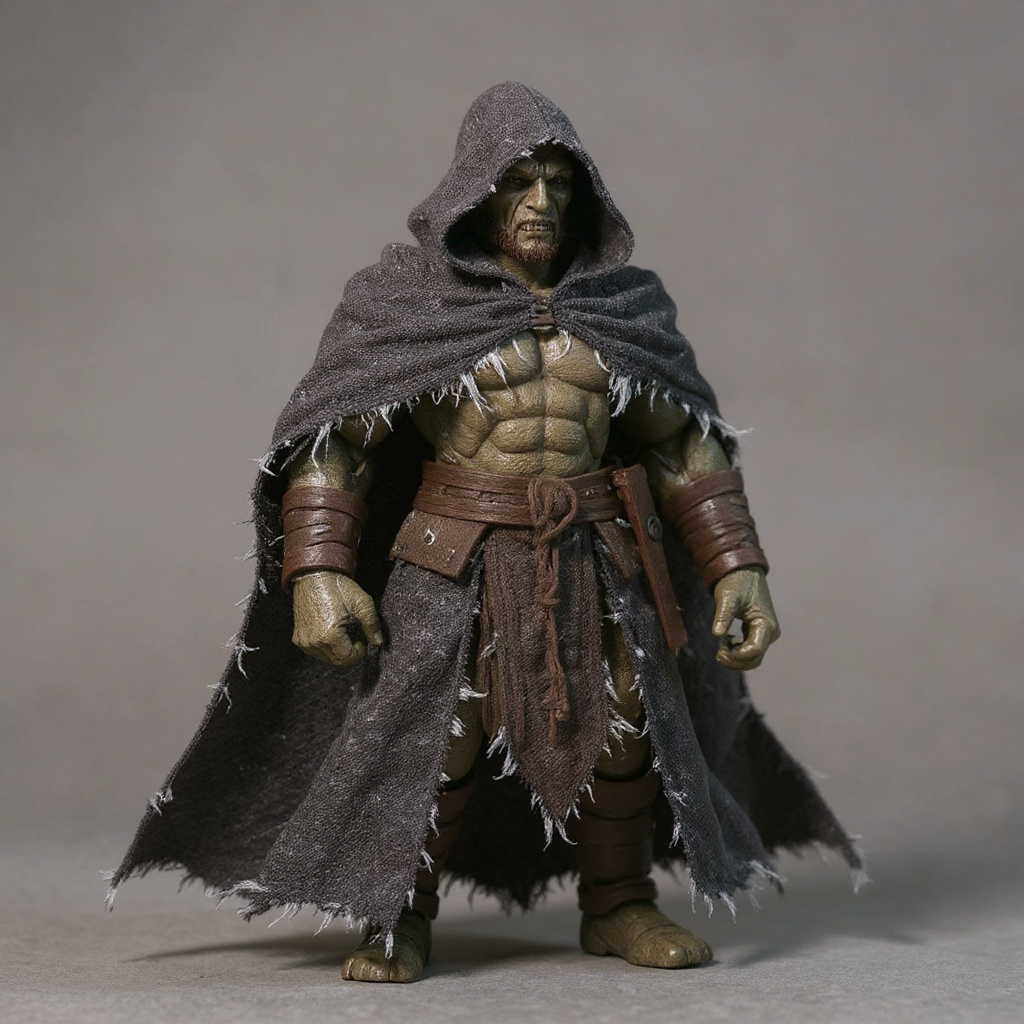
This matters most for photography. A wired cape fakes wind without a single fan running. Your ogre mage can look like he's striding through a mystical storm while sitting on a perfectly still shelf, dust settling on everything except him.
The action figure community on Reddit has embraced wired soft goods as a premium upgrade over the last few years. Factory accessories from big manufacturers typically use molded plastic, and plastic simply can't replicate the fold patterns fabric makes when it drapes over an armature.
Wire Types and Gauge Selection
Not every wire works. The metal needs to bend by hand but hold position once the fabric's weight settles onto it.
Copper works best for most projects. It bends without tools and doesn't corrode — I've got a cape from 2019 that's been reshaped at least forty times and the wire hasn't cracked once. Aluminum is lighter but fatigues fast; I've snapped aluminum wire inside a channel after maybe a dozen bends, which meant unpicking stitches I'd just finished.
| Wire Gauge | Thickness | Best For | Bendability |
|---|---|---|---|
| 18 AWG | 1.02mm | Heavy coats, large figures | Requires pliers |
| 20 AWG | 0.81mm | Medium capes, most projects | Hand-bendable |
| 22 AWG | 0.64mm | Light fabrics, detail work | Very flexible |
| 24 AWG | 0.51mm | Delicate edges, small figures | Too weak for structure |
20 AWG sits in the sweet spot for 1/10 scale. It supports medium-weight fabric but shapes without tools. Anything thicker shows through thin material as a visible ridge — you'll see it under studio lighting even if you don't notice it in hand.
Wire length depends on the design. A simple hem needs roughly 150% of the finished edge measurement to account for curves. Complex multi-panel designs can eat 3-4 times the garment's perimeter in wire alone.
Stitching the Channel: A Step-by-Step
The channel method makes a fabric tube that fully encloses the wire. Here's the sequence I actually follow, every time:
1. Fold the hem over twice — a narrow 3mm fold first, then a wider fold that becomes the channel. 2. Pin the channel shut, leaving one end open. 3. Stitch 2-3mm from the fold line with a straight stitch, forming the tunnel. 4. Slide the wire in from the open end. Don't force it. 5. Trim wire ends flush and file them smooth. 6. Hand-stitch the open end closed. 7. Test-bend the finished edge before calling it done.
Some makers stitch directly over the wire to save a step. Don't. It creates visible lines and makes the wire impossible to replace later — you'll be cutting open finished seams the first time the wire fatigues.
For corners, plan wire placement early. Sharp corners need small relief cuts in the seam allowance. Curved sections want a slightly loose channel that doesn't fight the wire's own bending radius. The action figure repainting community has some solid tutorials on multi-panel channel work if you want to see it done by someone with steadier hands than mine.
Fabric Selection and Weight
Fabric choice changes how well the wire performs. Heavy canvas or denim fights the wire and folds unnaturally thick. Ultra-light organza doesn't have enough body to show off the shaping at all.
Medium-weight cotton and cotton blends hit the balance. They drape on their own while still answering to wire manipulation. Slight stretch in the weave helps too.
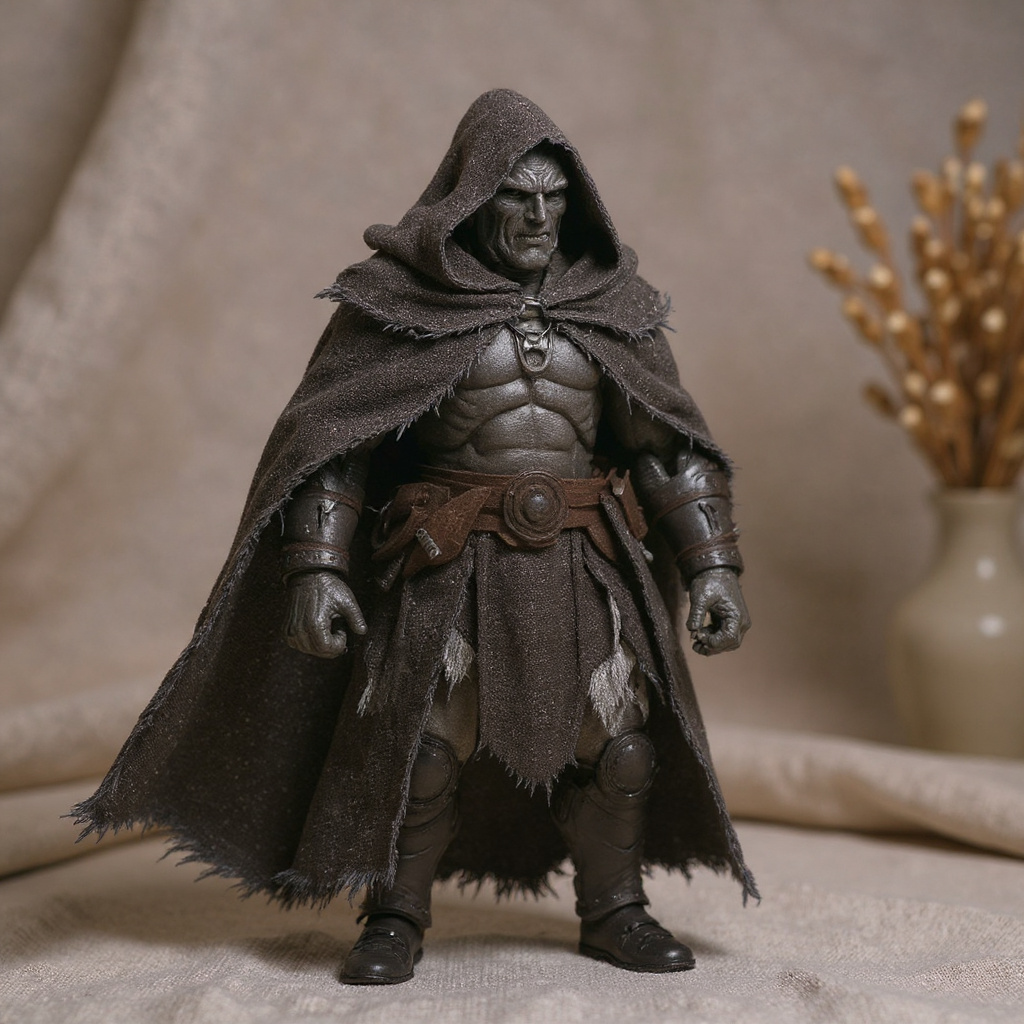
Texture matters for fantasy pieces specifically. Rough-weave monk's cloth or light canvas reads as aged and weathered. Smooth cotton reads newer, more refined — wrong mood entirely for an ogre mage cloak.
Color hides mistakes. Dark, weathered gray-brown tones — the kind used on the Godash Boneglyph Ogre Mage Cloak — conceal stitching and wire channels far better than pale fabric ever will. Other makers achieve similar results with hand-dyed muslin or distressed linen; the Boneglyph piece is one solid example among several worth studying, not the only option out there.
Honestly, if you live somewhere humid, reconsider copper entirely for outdoor or non-climate-controlled display. It'll develop green patina inside a season, and once fabric absorbs that oxide, no amount of cleaning brings it back.
Pre-wash cotton to kill shrinkage before you cut a single pattern piece. Finish raw edges with pinking shears or a serger if you've got one.
Scale Proportions and Pattern Adjustments
1/10 scale creates problems full-size sewing never prepares you for. A 9.84-inch figure doesn't scale linearly with your instincts.
Seam allowances shrink hard. A 15mm allowance on a human garment becomes about 1.5mm here — too narrow for most home machines, so you oversize slightly and trim after stitching.
Pattern pieces need 6-8mm added to any wire-bearing edge, covering the channel fold and wire thickness. The garment measures correctly once the wire's installed, not before.
Figure proportions vary by brand. A pattern fitted to a Storm Collectibles body might swim on a ThreeA frame. Test in cheap muslin first. Always.
Common Installation Problems and Fixes
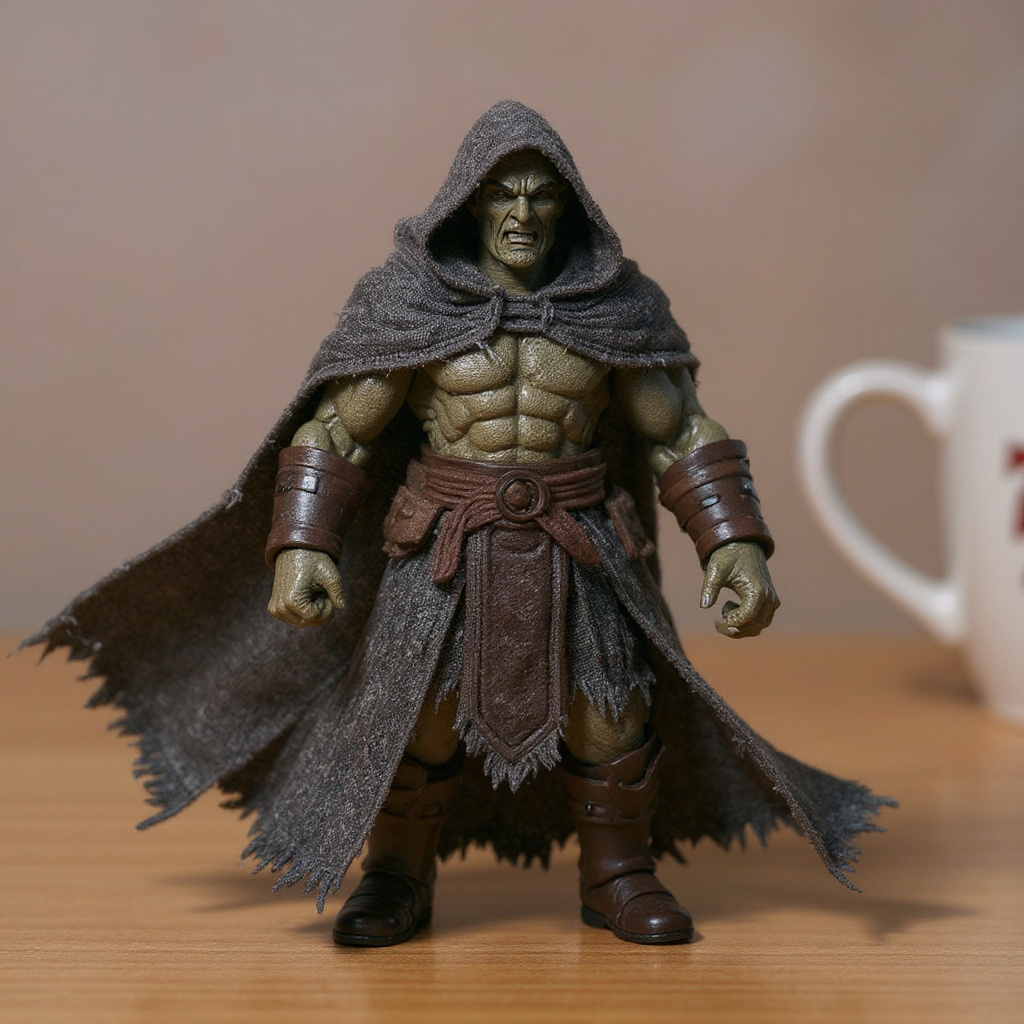
Wire poking through fabric is the most frequent complaint I hear. Usually the channel's too narrow, or the wire end wasn't finished.
File wire ends smooth before installation. Tiny burrs work through fabric fibers over months, not days — you won't notice until it's already poked through. Heat-shrink tubing on the ends adds a margin of safety.
Bunching happens when the channel's too tight for the gauge you chose. Fix it by opening the seam and resewing with a slightly wider allowance.
Wire fatigue shows up as kinks or breaks after repeated posing. Cheap hardware-store wire dies faster than quality copper — I've had bargain spools crack after ten bends. Replace it by opening one end and sliding fresh wire through.
Visible stitching distracts from the finished piece. Match your thread to the fabric exactly. Invisible thread exists but it's brittle and snaps under tension more than people admit.
Professional vs DIY: Cost and Quality Trade-offs
Mass-produced plastic capes run $15-30 and offer zero posability. Premium wired pieces from ball-jointed doll outfitters run $80-150. Handmade pieces like the Godash Boneglyph cloak sit around $119, reflecting individual pattern cutting and hand wire installation — no mass-production shortcuts anywhere in the process.
| Option | Price Range | Posability | Time Required |
|---|---|---|---|
| Factory plastic cape | $15-30 | None | 0 hours |
| Basic DIY hand-sewn | $8-15 materials | Moderate | 4-8 hours |
| DIY with pattern drafting | $12-25 materials | Good | 6-10 hours |
| Professional-grade DIY | $20-40 materials | Very good | 8-15 hours |
| Handmade commission | $80-150 | Excellent | 0 hours (your time) |
DIY cost breakdown, roughly:
1. Basic hand-sewn cape: $8-15 in materials. 2. Machine-sewn with drafted pattern: $12-25. 3. Professional-grade fabric and notions: $20-40. 4. Time for a first attempt: 4-8 hours, easy. 5. Practice pieces before good results: expect 2-3 failures. Not fun, but normal.
Value your time at $15/hour and a DIY cape runs $60-120 in labor plus materials. Suddenly the $119 commissioned piece looks less like a splurge and more like a fair trade.
What to Look For When Buying
Check stitch quality in photos first. Straight, even lines mean careful construction. Wobbly stitching means rushed work.
Wire placement should follow logical lines — hems, fold lines, collar edges. Random placement creates odd bulges instead of posability.
Fabric choice affects durability. Natural fiber ages better than synthetic but shrinks if untreated. Synthetic resists wrinkles but can look plasticky up close.
Fit matters more at small scale. A cape 2mm too wide overwhelms a 1/10 figure completely. Look for sellers who publish real measurements, not vague size charts.
Handmade imperfection isn't automatically bad. Slight stitching variation can sell the weathered look. Loose threads and exposed wire ends, though, mean poor quality control — no exceptions.
Frequently Asked Questions
How much does it cost to make a custom action figure cape or outfit? Materials run $8-40 depending on fabric and complexity. Budget 4-8 hours for a first attempt. Commissioned alternatives run $80-150 but skip the learning curve entirely. How do you make custom clothing for action figures at home? Start with a paper pattern fitted to your specific figure. Cut fabric with 6-8mm extra on wire edges. Sew the channel, install 20-22 AWG copper wire, finish seams. Expect a few rough attempts before it looks right. Is there a company that makes custom action figures with soft goods included? A handful of companies offer full custom figures with soft goods, typically $300-800+. Most collectors find it cheaper to buy the figure and add wired soft goods separately. Can I make a custom action figure of myself using wired soft goods? Yes, provided you start with a base figure that roughly matches your proportions. Custom head sculpts exist from independent artists, and wired soft goods replicate most clothing styles at 1/10 scale. Has anyone made their own soft goods capes before buying one? Most collectors try DIY first. The learning curve is real, but a basic cape is achievable in a weekend. Multi-panel garments need more sewing background before they look clean. What's the community preference — wired soft goods or molded plastic capes? Most serious collectors prefer wired soft goods for display figures, full stop. Plastic still works fine for shelf pieces that never get repositioned or photographed. How do you stitch the wire channel so it doesn't show through the fabric? Double-fold the hem so it fully encloses the wire in a tunnel. Stitch 2-3mm from the fold with matching thread. Never stitch directly over the wire — it shows, and it locks you out of ever swapping the wire later. Does wire gauge actually matter for a cloak this small, or is 20 AWG overkill? It matters. I tried 18 AWG on a 1/10 test piece once and the lumps showed through even medium cotton under studio lighting. 20 AWG disappeared into the same fabric completely.So Is Wired Soft Goods for Figure Customization Worth It?
Wired soft goods turn static figures into display pieces that hold a pose like they mean it. Not every collector needs that. If you rarely touch your figures once they're on the shelf, plastic accessories do the job fine, and there's no shame in that.
But if you photograph figures, build dioramas, or just like fussing with a pose until it's right — the wire is the difference between fighting your cape and directing it. For collectors chasing that windswept, storm-through-stillness look, pieces built around wired soft goods for figure customization, like the Godash Boneglyph Ogre Mage Cloak, turn an ordinary figure into a shelf centerpiece. Worth it? For me, yes. For everyone? Not always.

