


Action Figure Customizing Cloth Parts: A Customizer's Field Guide to Dark Medieval Capes
By Mr.Ruan, Designer — eight years building soft goods for 7-inch scale figures Quick answer: Action figure customizing cloth parts for a 7-inch scale medieval cape need 8-12 oz cotton canvas or aged linen in deep gray-brown or black, 20-22 gauge wire sewn into the hem for shape, visible frayed edges for authenticity, and a diorama base with matching props. That combination — fabric weight, wire gauge, and scale ratio — is what separates a convincing cloak from a costume-shop scrap.When you're building or restoring action figures, cloth parts make all the difference between a display piece that looks like it survived a siege and one that screams "toy." Action figure customizing cloth parts require specific materials, wire integration, and scale math that separate amateur attempts from professional-quality work. Unlike rigid plastic accessories, soft goods give figures natural drape and dynamic posability. I've sewn probably 200 of these cloaks by now. Some held up. Some didn't.
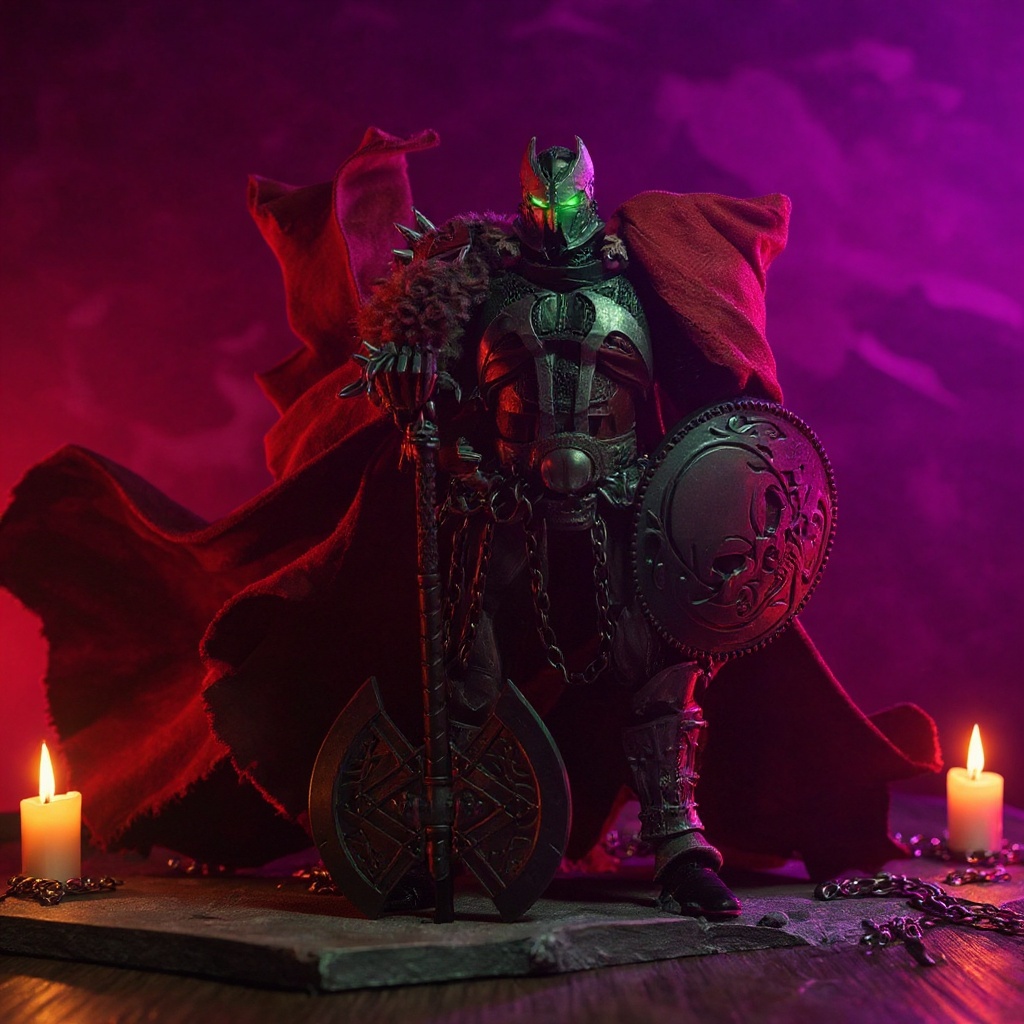
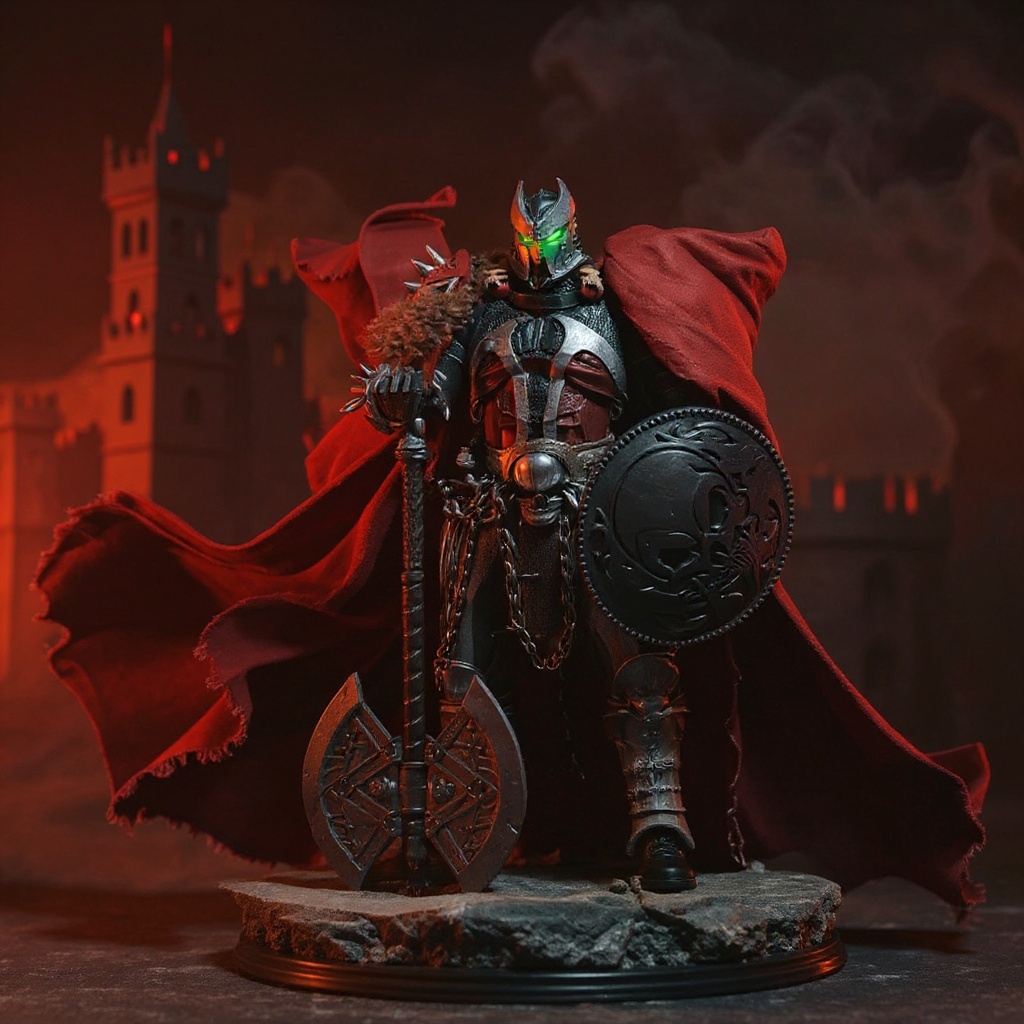
Working with cloth accessories opens up possibilities plastic can't match: a weathered cloak with real frayed hems, a cape that billows over a diorama base scattered with medieval props, or a garment that turns a generic 7-inch figure into a specific character. Mastering action figure customizing cloth parts is what separates casual collectors from serious ones.
Essential Materials for Action Figure Customizing Cloth Parts
Choosing the right fabric decides whether your cape looks like history or Halloween. Cotton canvas works for structured medieval pieces — armor padding, thick collars — and it typically runs 8-12 ounces per square yard. Silk and lightweight cotton drape well for robes. Denim and heavy cotton simulate leather or thick cloak material for a rough, battlefield look.
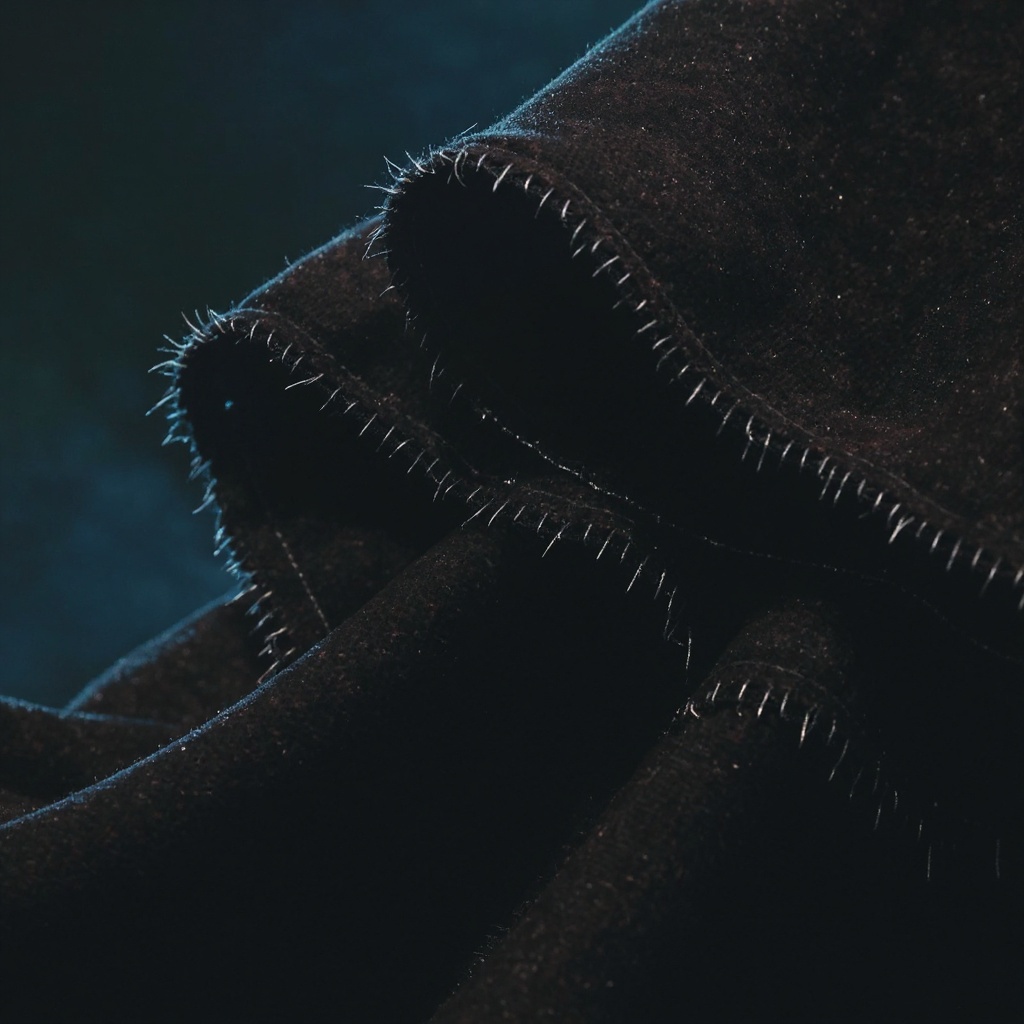
For a dark, textured medieval cape in gray-brown or near-black tones, natural fibers age better than synthetics. You can distress cotton canvas with sandpaper along the edges, tea-stain it for a dirty patina, or carefully singe the hem for burn damage. Polyester capes just melt into shiny plastic-looking blobs under a lighter. Don't bother.
Wire integration is where amateur work and professional work split apart. 22-gauge craft wire sewn into hems allows dynamic, windswept poses that hold their shape on a shelf or in a photo. Interior armatures need to flex for repeated adjustment but stay stiff enough to hold a dramatic silhouette. Heavier cloaks, especially the thick medieval style built for 7-inch figures, often need 20-gauge wire or a thin aluminum strip along the collar and hem for the shape to read properly under studio lighting.
Thread selection matters more than most beginners think. Standard polyester thread handles most seams, but upholstery-weight thread earns its keep at cape attachment points, where the fabric takes the most stress during posing. Contrasting stitching — visible, slightly uneven, deliberately imperfect — actually helps sell a hand-sewn, period look. Perfect machine stitching, oddly, looks wrong on a medieval piece.
Scale Considerations and Measurements
Action figure scales create challenges doll clothes were never built for. 1/12 scale figures (about 6 inches) need cape pieces that don't match human proportions at all. A 6-inch figure's cape might run 4-5 inches shoulder to hem.7-inch scale figures — the size most collectors want for display-grade medieval characters — sit in a slightly larger, more forgiving range. A full cloak at this scale, draped over a diorama base with props like a stone pedestal or broken sword, typically extends 7-8.5 inches with proper draping and enough excess fabric to fold naturally at the feet.
1/6 scale figures (roughly 12 inches) offer more room for detail but need heavier fabric to drape convincingly. Lightweight material that looks perfect on a 6-inch figure often looks stiff or oddly bulky blown up to 12 inches. Fabric weight has to scale proportionally. What passes for heavy canvas at 12 inches might require actual medium-weight canvas at 7-inch scale, not something lighter.
Measurement techniques diverge from standard sewing patterns fast. Figure shoulders on a 7-inch scale body typically measure 2-2.5 inches across, but the cape fabric needs 3-3.5 inches to allow for drape and movement without pulling tight across the joints. Sleeve and hem lengths must account for articulated elbows and knees, which change effective limb length depending on the pose.
Construction Techniques That Last
Hand-sewing gives the most authentic result for a rough medieval piece, but machine stitching survives repeated handling better. French seams work for lightweight fabric, hiding raw edges that fray. Flat-fell seams add strength for heavy-use areas. Serged edges stop fraying on pieces that get posed often — though for this specific product identity, a little fraying at the hem is the point, not the flaw.
Here's a basic build sequence I use for a 7-inch medieval cape with wire-shaped hem:
1. Drape a paper or muslin template directly on the figure, pinning at the shoulders and marking where the hem should fall against the diorama base. 2. Cut the fabric with a half-inch seam allowance, leaving extra length at the back for a dramatic swept pose. 3. Sew the wire channel along the inside hem using a zipper foot, keeping stitches close to the wire without piercing it. 4. Insert 20-22 gauge wire, bend-test it before final stitching, then adjust tension so it holds a curve without kinking. 5. Distress the edges with sandpaper or careful singeing for the frayed medieval look. 6. Tea-stain or dry-brush the fabric for a deep gray-brown or near-black weathered tone. 7. Mount on the diorama base, arranging folds around the medieval props before final photography.
Attachment methods vary by figure type. Velcro strips sewn into the back seam allow costume swaps. Snap fasteners work for structured pieces. Magnetic closures hidden in fabric folds look seamless but need careful placement so they don't interfere with articulation joints — I've ruined more than one elbow joint learning that the hard way.
Specialized Tools and Equipment
Sharp fabric scissors make clean edges. Rotary cutters handle straight lines and multiple layers fast. Curved scissors help with armholes. Seam rippers become essential once you start adjusting fit on a finished piece, and you will need them more than you expect.
Pinking shears create a decorative, slightly rough edge that suits medieval or fantasy costume work, where a rough-hewn look is a feature. Fabric markers wash out or fade with time so you can mark placement lines without leaving permanent marks. Heat-erasable pens work on synthetics that don't wash easily.
Sewing machine feet make specialized work easier. Zipper feet allow close stitching around wire inserts. Walking feet stop slippery fabric like silk from sliding during a seam. Buttonhole attachments make closures that survive years of handling instead of pulling apart after a season.
Custom vs. Ready-Made Options Comparison
| Option | Cost Range | Fit Quality | Detail Level | Turnaround Time |
|---|---|---|---|---|
| DIY Sewing | $5-15 materials | Perfect, if skilled | Unlimited customization | 2-8 hours |
| Custom Commission | $35-85 | Excellent | High, based on reference | 2-6 weeks |
| Modified Doll Clothes | $8-25 | Poor to good | Limited | 1-3 hours modification |
| 3D Printed + Fabric Hybrid | $20-40 | Good | Moderate | 1-2 weeks |
| Factory Replacement | $15-30 | Good for original figure only | Low | 1-2 weeks shipping |
| Pre-Made Wire-Shaped Cape Set | $45-55 | Excellent, scale-matched | High | Ships in 3-5 days |
Custom soft goods like our Medieval Cape Set for 7-inch figures sit between full DIY and a $200 commission. The wire-shaped hem and frayed dark fabric edges are already built in, which saves the 6-8 hours most first-timers spend just getting the wire channel straight. That said — if you enjoy the process more than the result, skip buying and build it yourself. Half the fun is the mistakes.
Restoration and Repair Strategies
Original cloth accessories deteriorate faster than the figures they're attached to. Elastic loses stretch. Fabric fades. Lace trim disintegrates into dust if you store it somewhere too dry for a decade.
Seam repair starts with matching thread color and weight as closely as you can get it. Reinforcement stitching behind a damaged area stops the tear from spreading, and patches cut from similar fabric can replace sections too far gone to save. For genuinely valuable vintage pieces, conservation-style reversible repairs protect resale value better than a permanent fix.
Wire replacement in a damaged cape means carefully picking out the hem stitching first. Remove the old wire completely before inserting new wire of the same gauge — mixing gauges creates uneven bends that look wrong under any lighting. Test the flex and pose-holding ability before you commit to final stitching. Honestly, if you live in a humid climate, skip natural linen capes with steel wire cores entirely. The wire rusts through the fabric within two years and stains the cloth from the inside out. I learned that on a client piece in Florida. Not fun to explain.
Photography and Display Considerations
Action figure customizing cloth parts photograph best when the lighting shows off texture, not just silhouette. Side lighting emphasizes fabric folds and shadow depth across a dark cape. Backlighting turns a flowing cloak into a dramatic outline against a medieval diorama backdrop.
Pose planning has to account for how the fabric will actually behave once you move the figure. Cloaks and robes with wire shaping hold a windswept pose on their own. Softer accessories, like a thin scarf, need temporary support during the shoot — a bit of fishing line does the job. Hair dryers on the cool setting create motion blur for action shots.
Display cases bring their own problems. Fabric needs periodic repositioning to avoid permanent creasing from sitting in one pose too long. UV-filtering glass slows fading under bright display lighting. Cedar blocks or other natural moth deterrents protect wool and silk pieces during long-term storage in a closed case.
Advanced Techniques and Special Effects
1. Battle Damage Weathering: Tea staining ages natural fibers; careful singeing adds burn damage at the edges. 2. Armor Integration: Sewing fabric to lightweight EVA foam creates mixed-media costumes with realistic weight distribution. 3. Magnetic Accessories: Rare earth magnets sewn into hidden pockets allow quick prop swaps during a photo session. 4. Removable Weathering: Chalk pastels create temporary dirt and wear effects that brush off between display looks. 5. Wire Armatures: Complex internal wire structures allow dramatic, impossible-looking poses while the fabric stays believable. 6. Layered Construction: Multiple fabric layers add depth and can be partly removed to reveal underlying armor.
Frequently Asked Questions
Can I have a custom action figure made?
Yes. Many customizers offer full figure creation, though costs typically range from $200-800 depending on sculpting complexity. Most requests, in my experience, involve modifying an existing figure rather than sculpting from zero — custom cloth parts are usually the cheapest way to change a figure's whole look without touching the sculpt.What materials are best for action figure customizing cloth parts?
Cotton canvas at 8-12 oz per square yard for structured pieces, lightweight silk or cotton for flowing robes, and denim for a heavier, leather-like look. Avoid pure synthetics for weathering — they melt instead of fraying and won't take a tea stain evenly.How do I build cloth parts for a 7-inch action figure from scratch?
Start with a paper or muslin pattern draped directly on the figure. Cut fabric with a half-inch seam allowance, sew a wire channel into the hem using 20-22 gauge wire, then hand or machine stitch the seams. Test the fit against the diorama base before final assembly, since fabric behaves differently once it's weighted with wire.What's the rule of thumb for finding clothes that fit 1/12 or 1/6 scale figures?
Most doll clothes are cut wrong for action figures — different shoulder width, different torso ratio. 1/12 scale figures need pieces built specifically for their proportions. 1/6 scale has more compatible off-the-shelf gear, but military and tactical pieces fit better than civilian clothing because the shoulder-to-chest ratio matches more closely.How much does a wire-shaped medieval cape typically cost versus DIY?
A pre-made wire-shaped cape for 7-inch scale runs $45-55. Materials for the same DIY build cost $8-15, plus 6-10 hours of your time if it's your first attempt. After your third or fourth cape, that time drops to 2-3 hours.How long does the wire in a hand-sewn cape actually last before it needs replacing?
In my own pieces, 20-gauge steel wire held its shape for roughly 3 years of regular repositioning before the bends started going soft. Aluminum wire lasted longer under low stress but bent permanently under sharper poses. Neither lasted forever. Plan to re-wire eventually.Where can I find recommendations for custom soft goods sellers for action figures?
Customizing forums, Instagram hashtags like #actionfigurecustoms, and Facebook collector groups are the fastest sources for real recommendations. Look for sellers who post work-in-progress photos and can talk specifics — wire gauge, fabric weight, stitch type. If a seller won't answer a direct question about materials, that's a red flag.Does the ChatGPT action figure trend relate to real customizing?
Not really, no. The trend involves AI-generated character concept art styled to look like a boxed action figure, but turning that image into a physical custom still requires traditional sewing, wire work, and scale math. Use the AI image as a mood board. Build the actual piece with real fabric and real measurements.Conclusion
Mastering action figure customizing cloth parts turns a static shelf figure into something closer to a diorama scene. The right fabric weight, the right wire gauge, and scale-correct measurements make the difference between a convincing medieval cape and a costume scrap glued to a toy. Some of that only comes from doing it wrong a few times first.
For collectors who'd rather skip the trial-and-error, pieces like our Medieval Cape Set for 7-inch figures come with the wire shaping and frayed dark fabric edges already built in. Browse the full 7-inch cape collection or check our fabric care guide if you're maintaining an existing piece.

