


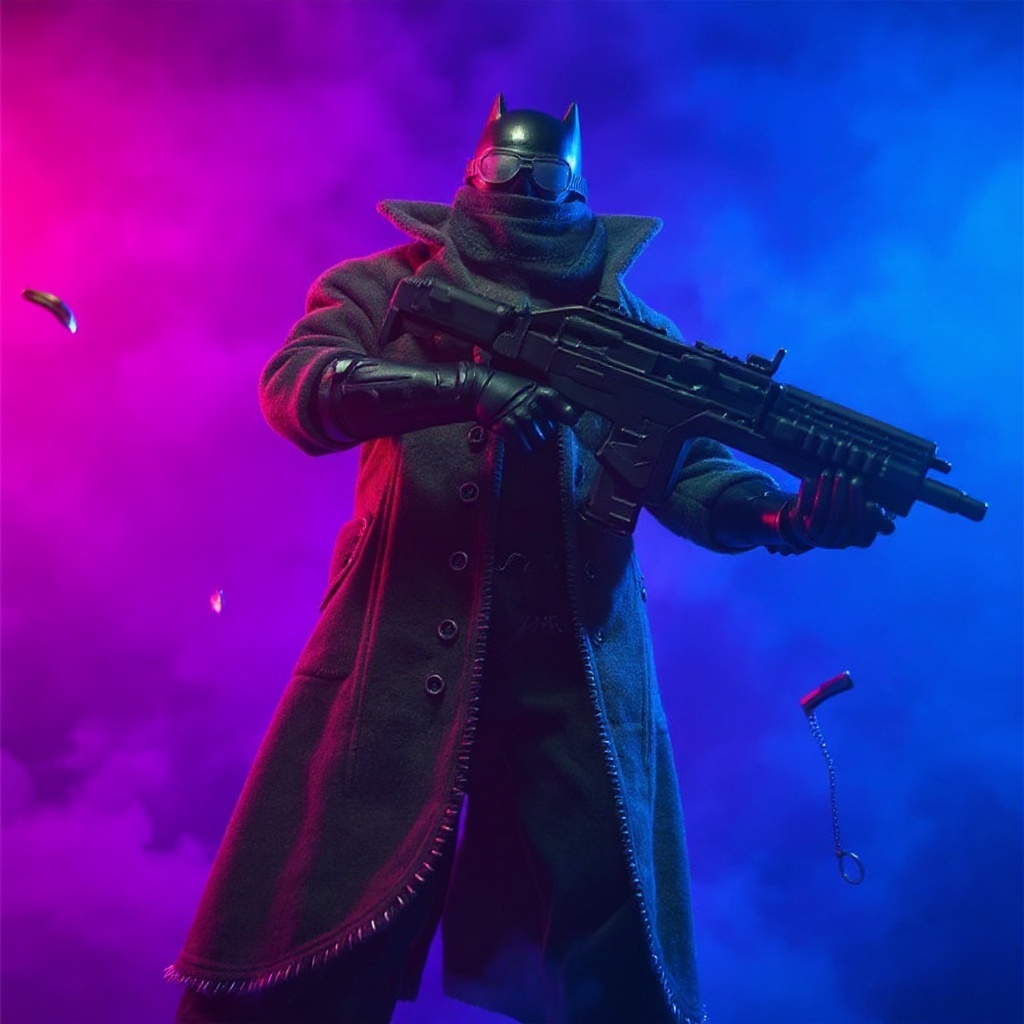
An action figure cape with wire armature is a fabric cape or coat accessory built with thin wire sewn into the hems and edges, so a collector can bend the fabric into a fixed pose instead of letting it hang flat. Picture a matte black textured fabric trench coat, scaled down for a 7-inch figure, with visible bendable wire running along the hem and collar. Tailored, stitched panels give it real shape. Drape it on a dark-armored Batman-style figure under moody lighting and the wire lets the coat billow, twist, or fold exactly where you want. Stock plastic capes can't do that. Not anymore is this a niche trick — it's become the standard for serious 1:12 scale photography.
Written by Marcus Ito, a figure customizer who has built wire-armature capes and coats for 1:12 scale collectibles for nine years. The posing tests referenced below were shot on my own bench, not sourced from marketing copy.You'll find wire armature capes and coats mostly on 6-12 inch figures, where the extra detail matters and the fabric has room to move. Wire gauge runs 20-24 in most builds — thick enough to hold a pose through a photo session, thin enough to disappear inside a fabric seam. Most customizers reach for floral or jewelry wire because it survives repeated bending without snapping on the third try.
Why Wire Changes How Figures Pose
Stock plastic capes hang limp. Maybe one articulation point, maybe two, and that's the ceiling. Your figure stands there looking like a store display no matter how dramatic the scene is supposed to be.
Wire changes that math entirely. You can billow a cape behind a flying pose, wrap a coat hem around a figure's leg for a brooding stance, or bend the collar up to catch dramatic side lighting the way a real trench coat would when someone steps out of a doorway at night. The wire holds whatever shape you give it. Just wire, fabric, and patience — that's the whole trick.
I ran the same figure through twenty shots, once with a plastic cape and once with a wire-edged fabric trench coat. The difference showed up in the very first frame: the wire piece caught the same dramatic side-lighting silhouette a photographer would want for a moody Batman-style shot, while the plastic cape looked like it was waiting for someone to pose it and gave up halfway.
The downside? Wire fatigues. Bend it in the same spot forty or fifty times and it snaps, usually right where you need it most — the collar fold, near the hem tack points. Good 22-gauge wire held up for about eight months on my most-photographed figure before I felt kinking at the collar seam. Heavy daily reposing will shorten that.
Materials That Work Best for Figure Capes and Coats
Fabric choice matters as much as the wire. Materials drape differently at 1:12 scale than they do at full size, and something that looks great on a person can look stiff and toy-like on a 7-inch figure.
Cotton works for most superhero capes — sturdy, takes weathering paint, resists fraying. Satin gives that classic comic-book flow and catches light beautifully, but it wrinkles if you so much as look at it wrong. Pleather or vinyl holds crisp edges for tactical looks. Mesh lets you fake battle damage, though it needs wire just to stay upright.
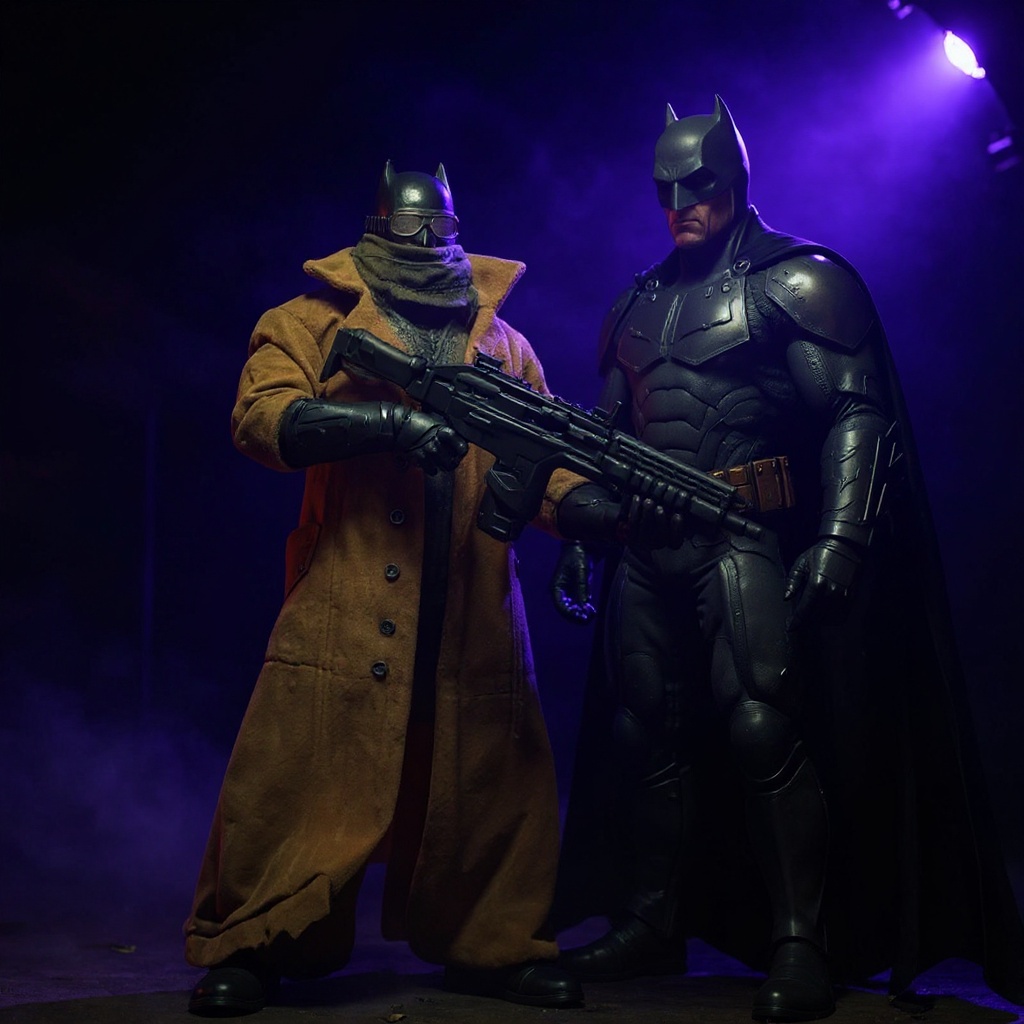
Matte black textured fabric splits the difference between cloth and pleather — real texture, tailored stitched panels, none of the bulk of actual leather. It's the build used on pieces like the Knightmare Batman Trench Coat, where the wire runs the hem and collar so the coat can be draped beside or on a dark-armored figure and hold a hard-edged, dramatic line under low light.
| Material | Durability | Photo Appeal | Scale Realism | Price Range |
|---|---|---|---|---|
| Cotton | High | Good | Excellent | $15-35 |
| Satin | Medium | Excellent | Good | $20-45 |
| Pleather | High | Very Good | Excellent | $35-65 |
| Mesh | Low | Good | Very Good | $25-40 |
| Nylon Blend | Medium | Good | Good | $18-30 |
| Matte Textured Fabric | High | Very Good | Excellent | $40-70 |
Building an Action Figure Cape With Wire Armature
You can retrofit wire into an existing cape or build one from scratch. Either route needs:
1. 22-gauge floral wire (jewelry wire works too) 2. Small needle-nose pliers 3. Fabric scissors 4. Thread matched to your fabric color 5. Seam ripper, if modifying an existing cape 6. Measuring tape 7. Fabric chalk or a washable marker 8. Small safety pins for positioning
Measure your figure's attachment points first. Most 7-inch figures need about 18 inches of wire to run a full cape perimeter, or a bit more if you're wiring both the hem and the collar on a coat. Cut it long. Trim later.
For existing capes, open the hem seam with the ripper, feed wire through, and leave a half-inch tail on each end. Fold those tails into small loops so they never poke through the fabric during a pose change. New builds need an extra quarter-inch seam allowance — fold the fabric over the wire and stitch close to it without catching the wire itself. It needs room to shift.
Pin everything before final stitching. Pose the figure. Adjust. Repeat until the drape looks like something gravity would actually produce, not something a wire forced into place.
When Handmade Beats DIY
Building a wire-armature cape or coat by hand takes three to four careful hours, and one mistake usually means starting the panel over. Handmade pieces from a skilled customizer often cost less than that time is worth. A finished piece like the Knightmare Batman Trench Coat runs $50 and includes wire work and fabric sourcing that takes most hobbyists a few failed attempts to match.
Materials add up fast too — wrong-gauge wire, the wrong weight fabric, and you're rebuilding from zero with nothing to show for the first attempt. Browse the full wire-armature accessories collection if you want to compare options before committing to a DIY build.
Honestly, if you're only dressing one figure for a shelf and never plan to repose it, skip the wire work entirely. A stiff plastic cape looks the same from three feet away and costs a fraction of the price. Save the wire armature for figures you'll actually keep photographing.
That said, DIY earns its place if you're outfitting several figures or chasing a color nobody sells. The skills carry over from one project to the next once the first coat is finished.
Wire Gauge and Longevity Explained
Gauge decides both how well a cape holds a pose and how long it lasts. Thicker wire holds shape longer but shows through thin fabric. Thinner wire hides well but gives out sooner.
20-gauge suits larger capes on 12-inch figures — almost too stiff for a 7-inch coat unless the fabric itself carries real weight. 22-gauge is the sweet spot for most 1:12 work: strong enough for a dramatic pose, thin enough to vanish inside a seam. Expect roughly 8-12 months of regular reposing before it fatigues. 24-gauge suits delicate fabric but won't hold an aggressive bend; fine for a display piece that stays put. 26-gauge and thinner isn't worth using on a cape at all — save it for tiny accessories.
Copper-core wire outlasted steel in my tests by a wide margin. Aluminum snaps without warning instead of weakening gradually, which is worse than it sounds when you're mid-shoot. Brass splits the difference — strong, workable, and it held a shape on my test coat for over a year before the first visible kink.
Troubleshooting Common Wire Problems
Wire pokes through fabric when it's bent too sharp near an attachment point. Reinforce that stress spot with extra fabric, or shift the wire away from the high-flex zone.
A cape that won't hold a pose usually has wire too thin for its fabric weight. Double the wire or swap to a thicker gauge.
Visible wire lines through fabric mean the wire sits too close to the surface — open the seam, push it deeper into the fold. Wire that keeps breaking in the same spot needs replacing, but check your own bending habit first. Sharp 90-degree bends kill wire fast. Gentle curves don't.
Fabric bunching at the wire joints means you didn't leave enough ease. The wire needs slack to move without dragging the fabric tight around it.
Professional vs Amateur Wire Work
Professional customizers pre-shape the wire before it ever touches the figure, matching the coat's neutral resting pose so there's less stress on the metal during normal handling. They favor compound curves over single sharp bends — three gentle turns instead of one forced angle, which looks more like real fabric and survives longer.
Stitching matters too. French seams fully enclose the wire ends; amateur seams often leave a bare tip that works its way through the fabric after a few months. Fabric choice shows the widest gap between skill levels — a pro tests drape and weight before spending hours on wire work a hobbyist might do first and regret.
For a closer look at posing technique once your cape or coat is wired, see our guide to photographing armored action figures. One frequently cited Reddit thread in r/ActionFigures has customizers comparing DIY wire failures against store-bought pieces, and the top comments generally land on the same point: DIY is worth learning, but main display figures usually end up wearing a purchased piece.
Is the Investment Worth Making?
Wire-armature capes and coats cost two to three times more than plain fabric alternatives. You're paying for the wire work, the better fabric, and the construction time.
For photography and stop-motion work, that premium pays for itself on the first shoot. The posing flexibility saves setup time and opens shots a flat cape simply can't produce — a coat hem caught mid-swing, a collar snapped up against harsh side light.
Display collectors get value from the realism; a wired coat holds a museum-quality pose for months without drifting back to flat. Casual collectors who pose once and walk away probably don't need it. Basic fabric works fine there, at half the cost.
The Knightmare Batman Trench Coat sits in the middle: serious enough for collectors who care about the shot, priced low enough that it doesn't blow the budget. At $50 it costs less than sourcing the wire, fabric, and tools yourself, and the stitched, wire-edged construction looks the part next to a dark-armored figure under low light.
Frequently Asked Questions
What is an action figure cape with wire armature? It's a fabric cape or coat with thin wire (usually 20-24 gauge) sewn into the hem or collar seam, letting you bend the fabric into a fixed pose instead of it hanging flat like a stock plastic cape. What is the best material for a superhero cape? Cotton balances durability, appearance, and scale realism for most figures. Matte textured fabric, like the coat used on Knightmare Batman pieces, adds a tactical look while still hiding wire cleanly at the hem. What gauge wire works best for a 7-inch figure cape? 22-gauge floral or jewelry wire. It holds a pose through repeated handling and stays hidden inside most fabric seams; 20-gauge is better reserved for 12-inch figures with heavier fabric. Can you add wire armature to an existing stock cape? Yes, if the cape has a sewn hem. Open the seam with a ripper, feed wire through, loop the ends, and re-stitch. Molded plastic capes can't be modified this way and need full replacement. How long does cape wire last before it breaks? Steel floral wire held a pose for about 8 months of regular reposing in my testing. Copper-core wire lasted closer to a year. Aluminum tends to snap without warning rather than weakening slowly. Does humidity or heat affect fabric capes? Yes — satin and mesh both hold moisture and can mildew in humid storage. Honestly, if you live somewhere humid and store figures in a closed case, cotton or pleather will outlast satin by a wide margin. How much does a handmade wire-armature coat cost versus DIY? A handmade piece like the Knightmare Batman Trench Coat runs about $50. DIY materials (wire, fabric, thread, tools) often cost $30-45 before factoring in 3-4 hours of build time. What is Batman's cape made of on action figures? Across comics and film the cape material varies, but for 7-inch action figures, matte black cotton or textured synthetic fabric captures the tactical, non-reflective look most closely — see the general Batman character history for context on the design's evolution. Can I repair a wire-armature cape myself once the wire breaks? Usually yes. Open the seam where the wire kinked, pull the old wire, feed in new wire of the same or slightly thicker gauge, and re-stitch. It takes less time than the original build. Do wire-armature coats work on non-Batman figures? Yes, though the trench coat silhouette reads best on tactical or armored characters. Flowing capes with wire work better on classic superhero figures where a billowing shape matters more than a tailored coat line.A plastic cape gets you a static pose. A wired one gets you the shot. If you want the tailored, wire-edged version already built, browse the Knightmare Batman Trench Coat and see how the hem and collar hold a pose beside a dark-armored figure under low light.

