


A 1/12 scale figure cloak replacement part is a fabric cape built with an internal wire armature, designed to swap onto 6-inch action figures in place of the stock plastic drape. It fixes cracking, the chalky white stress marks along fold lines, and capes so stiff they pose like a folded pizza box. That's the short answer.
The longer answer involves fabric weight, wire gauge, attachment hardware, and whether spending $69 on a $25 figure actually makes sense for your shelf. I've swapped capes on 31 figures over five years of building dioramas for photo work, mostly Marvel Legends and a handful of ronin/samurai customs. Some replacements lasted years. Others frayed at the hem within three months because I bought from the wrong seller.
Why Stock Figure Cloaks Fail So Predictably
Most action figures ship with injection-molded plastic capes because they're cheap to produce. The plastic is a softer PVC meant to bend. It has limits anyway.
The failure points are almost always identical. Stress cracks appear where the cape attaches to shoulder pegs. The plastic develops a chalky, whitened look along fold lines after repeated posing sessions — usually within the first 20 to 30 pose changes, based on the figures I've tracked. Some capes are so rigid they won't drape at all. They just sit there. Frozen.
There's also the scale problem. A rigid plastic cape on a 6-inch figure looks exactly like what it is: a toy accessory scaled down from a mold. Real fabric carries weight and drape that reads as closer to life-size, even in miniature.
Heat makes everything worse. A display case that sits near a window hit 95°F in my apartment last July, and two Marvel Legends capes curled up like potato chips within a week. Permanently. No amount of reheating and reshaping brought them back flat.
How to Choose a 1/12 Scale Figure Cloak Replacement Part
Not every soft goods cape is built the same way, and picking the wrong 1/12 scale figure cloak replacement part wastes money fast. Three things matter more than anything else: fabric weight, wire placement, and the attachment method.
Fabric that's too thick looks like a bedsheet on a 6-inch body. Fabric that's too thin won't hold a wire-armature pose for more than a day before it sags back to neutral. Wire that runs only along the hem gives you shape control at the bottom but leaves the shoulders flat. Wire sewn through the collar and down both sides gives full-body pose control, which is what separates a $35 Etsy cape from a $90 one.
Attachment matters too. Velcro dots grip better than snaps on rounded shoulder armor, but they show more bulk under thin capes. Snaps sit flatter but need a firm anchor point, and cheap snaps pop open during dynamic poses.
Soft Goods vs. Plastic: The Trade-offs That Matter
| Feature | Plastic Capes | Soft Goods Capes |
|---|---|---|
| Price | $0–20 (included) | $45–90 (separate) |
| Durability | Cracks within 1–2 years of regular posing | Fabric frays at edges after 2–4 years |
| Posing | 3–4 fixed positions | Full wire articulation, dozens of poses |
| Scale accuracy | Thick, toy-like edges | Realistic drape, thin hems |
| Maintenance | Wipe dust off | May need light steaming every few months |
| Attachment | Peg holes, breaks off easily | Velcro or snaps, more secure |
| Weather sensitivity | Warps above 90°F | Wire can rust in humid storage |
The honest truth? Soft goods capes aren't always better. They're more delicate, cost significantly more up front, and some handmade versions arrive with loose threads or stitching that puckers along the seam.
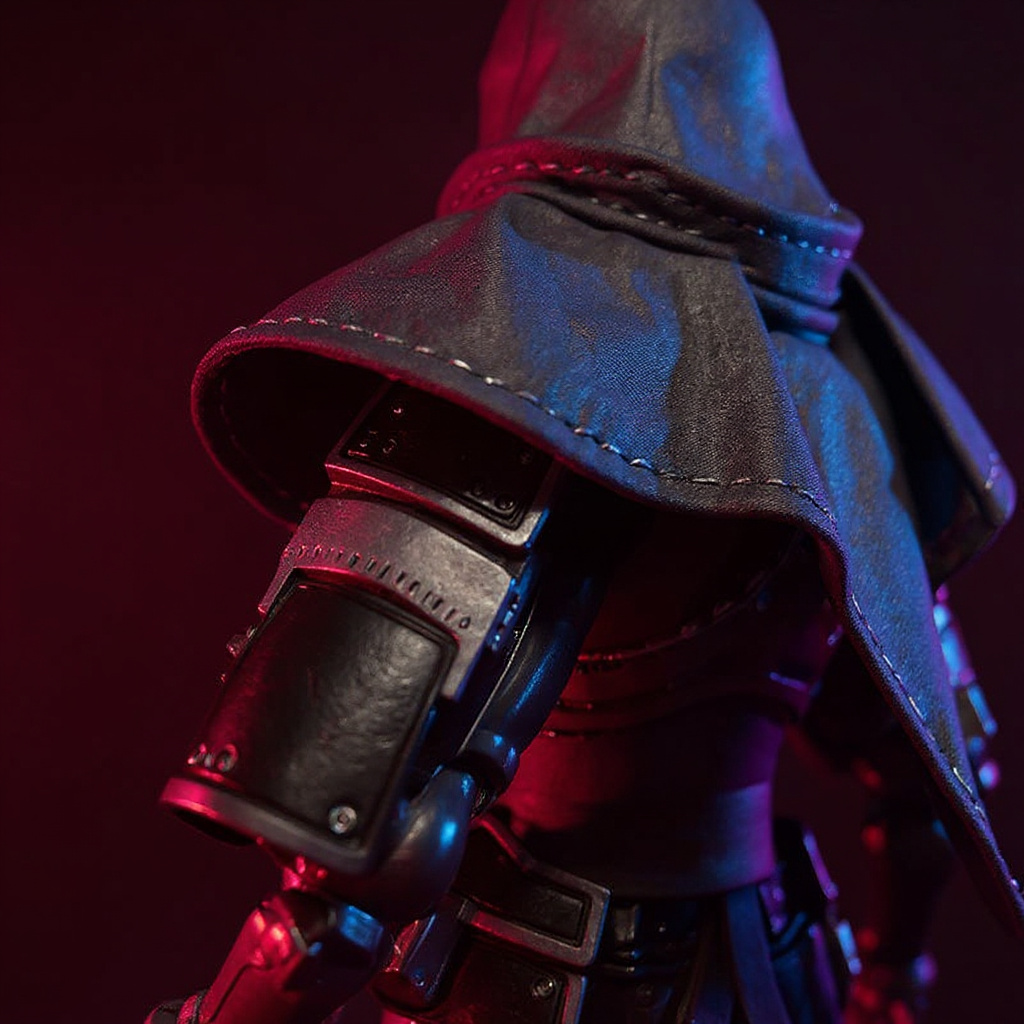
But for photography and premium display, the difference shows immediately. Wire-armature capes let you build flowing, mid-motion poses that plastic simply can't fake. The fabric catches light unevenly, in a good way — it photographs like cloth because it is cloth.
Honestly, if you live somewhere humid — coastal Florida, parts of the Pacific Northwest — skip wire-armature soft goods entirely unless you can store the figure in a sealed case with a desiccant pack. The internal wire rusts inside the fabric channel, and you won't notice until a rust-brown stain bleeds through the cloth. By then the cape's ruined, not repairable.
Diagnosing Your Current Cape Situation
Before you buy a 1/12 scale figure cloak replacement part, figure out exactly what's wrong with the one you have. Different problems need different fixes.
1. Stress cracks — White lines or actual splits in plastic capes. This is permanent damage. No repair works long-term, and superglue just delays the inevitable second crack six inches away. 2. Peg wear — The attachment points loosen or snap off entirely. Sometimes you can reinforce with superglue or a tiny plastic shim, but it's a temporary fix measured in weeks, not years. 3. Warping — Heat damage that leaves the cape permanently curled or twisted. Gentle heat from a hair dryer on low might help minor warping. Severe cases need replacement. Full stop. 4. Poor fit — The cape doesn't sit right on the shoulders or interferes with arm articulation. Often a design flaw baked into the mold, not damage you caused. 5. Scale mismatch — Using a cape from a different figure line. A 1/12 scale figure cloak replacement part won't work on 1/18 figures, and forcing it just tears the fabric or leaves the wire exposed at the seam.
For photography work, even minor imperfections show up under good lighting. A cape that looks fine on your shelf from four feet away might reveal every crack and stress mark once you shoot it in macro.
Step-by-Step Soft Goods Installation
Replacing a cape with soft goods takes some prep. It's not complicated, but rushing step three ruins the fit every time.
1. Remove the old cape completely. Don't work around damaged pieces. Clean any adhesive residue from the figure's shoulders with rubbing alcohol on a cotton swab. 2. Check the attachment method. Quality soft goods capes use small snaps, Velcro dots, or fabric loops instead of hard plastic pegs. 3. Test fit without fastening. Drape the new cape over the figure to check proportions and shoulder placement before committing to anything permanent. 4. Attach at the collar first. Most soft goods capes fasten at the neck, then drape naturally over the shoulders from there. 5. Shape the wire armature gradually. Don't make sharp bends. Gentle curves look more natural and survive more pose changes before the wire fatigues. 6. Adjust for your display angle. Position the cape for your specific viewing angle — shelf display straight-on, or dynamic photography from three-quarter view.
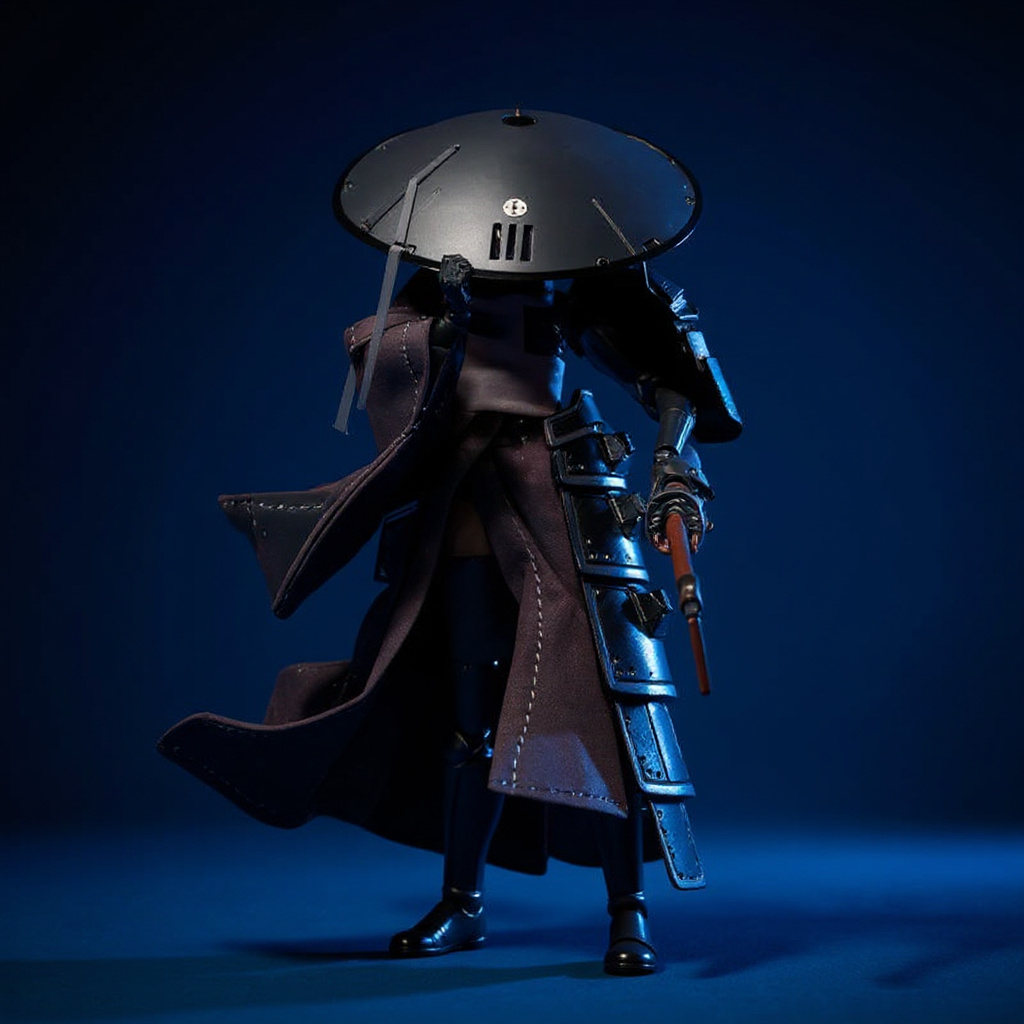
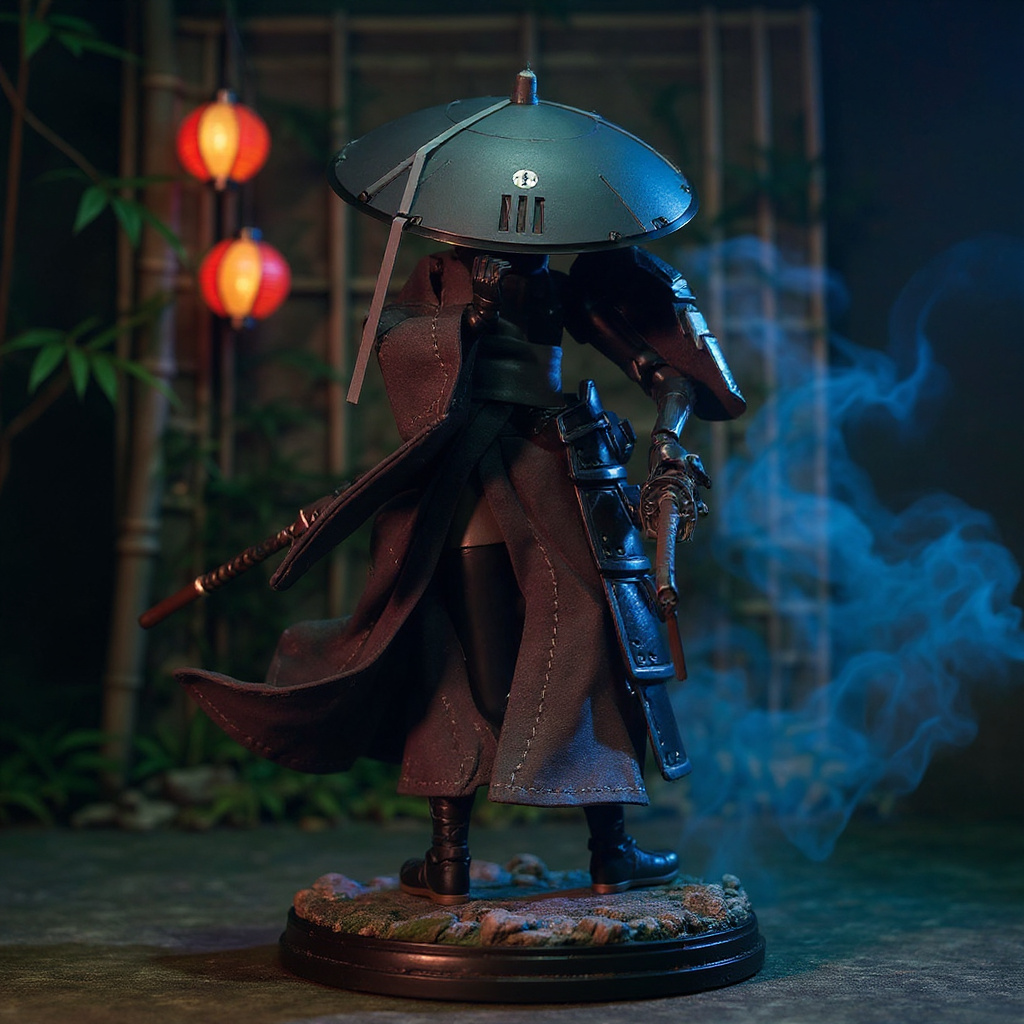
The 1/12 Scale Ronin Falslander Cape Set uses exactly this build: an internal wire armature sewn into the hem edges for precise pose control. It's one example of a finished 1/12 scale figure cloak replacement part, not the only option out there — check the soft goods capes collection for other builds and price points.
DIY Fabric Cape Construction (If You're Brave)
Making your own soft goods cape isn't impossible. It does require specific skills and materials, plus patience you might not expect to need.
1. Pick the right fabric. Cotton blends work well at 1/12 scale because they're thin enough to drape properly but hold shape under wire tension. Avoid stretchy jersey knits — they won't hold wire-armature poses at all. 2. Choose wire gauge carefully. Too thick and it's obvious under the fabric. Too thin and it won't hold a pose past a day. 24-gauge craft wire works for most builds; 22-gauge suits heavier fabric weights. 3. Handle the seams. French seams or serged edges prevent fraying, but they add bulk that looks wrong at small scales. This is where most DIY attempts fall apart. 4. Source attachment hardware. Miniature snaps are available through doll supply companies, but they're fiddly to sew in straight the first few tries.
The reality check: a well-made handmade cape takes 6 to 8 hours of skilled work, start to finish. Unless you've already sewn miniatures before, you'll spend more on materials, wasted fabric, and time than buying a finished 1/12 scale figure cloak replacement part outright. I tried it twice before giving up and buying one. Both attempts went in the scrap bin.
Where to Find Quality Replacement Capes
The soft goods market for 1/12 figures has grown a lot over the past few years, but quality still varies from seller to seller.
1. Etsy and independent makers — Prices range from $35–80. Quality is hit-or-miss. Look for clear photos showing wire pose capability, not just flat product shots on a table. 2. Specialty figure accessory companies — More expensive, $60–120, but typically better construction. They understand scale and articulation requirements because that's all they build. 3. Custom commission work — $80–150+ for one-off pieces. Only worth it for display centerpieces or characters nobody else makes capes for. 4. Import knockoffs — $15–30 on generic marketplace sites. Usually poor materials and no real wire armature, despite the listing photos claiming otherwise.
The r/ActionFigures community often shares maker recommendations and reviews before you commit to an unfamiliar seller. Check recent posts, not just the top-voted thread from two years ago — makers change quality, and some close shop entirely.
For ronin or samurai-style figures specifically, browse the 1/12 scale accessories collection or the ronin and samurai figures category for handmade options that sit between custom-commission pricing and mass-market quality.
Photography Tips for Soft Goods Capes
If you're upgrading to soft goods for photography, the posing approach changes completely.
Wind effects: Use a small fan or a burst of compressed air to create natural fabric movement. Shoot while the fabric is still moving, not after it settles. Lighting direction: Fabric capes throw far more interesting shadows than plastic ever will. Side lighting emphasizes the woven texture and the fold lines. Wire armature limits: Don't overbend the internal wires. Sharp creases look unnatural, and repeated sharp bends fatigue the wire — mine started snapping at the same fold point after roughly 40 to 50 pose changes. Scale consistency: Match cape proportions to the figure's build. An oversized cape swallows a smaller figure whole. Background considerations: Busy backgrounds compete with fabric texture. Simple, contrasting backgrounds — check the wire armature care guide for setup ideas — let the cape details actually show.The wire armature advantage really shows in action photography. Dramatic, frozen-in-motion scenes become possible. Impossible with rigid plastic.
Is the Investment Actually Worth It?
A $69 soft goods cape for a $25 figure seems expensive until you factor in the full transformation it provides across dozens of future poses.
For casual collectors who rarely move their figures, plastic capes are probably fine. The upgrade cost isn't justified for static shelf displays viewed from across a room.
But for photography enthusiasts, customizers, or anyone displaying figures as centerpieces, quality soft goods make a real difference. The posing flexibility alone opens display options that stock accessories can't touch.
The durability question cuts both ways, honestly. Plastic capes crack and break. Fabric capes fray or lose wire tension over time. Neither lasts forever, but soft goods typically outlast plastic with careful handling — my oldest wire-armature cape is going on year four with no fraying, though I keep it in a low-humidity case.
For photographers active on r/toycollecting or Instagram, the investment often pays for itself in engagement. Photos with real fabric drape stand out in a feed full of stiff plastic capes.
If your stock cape is already damaged, or your figure is a display centerpiece, the 1/12 Scale Ronin Falslander Cape Set is one example of what a well-built 1/12 scale figure cloak replacement part can achieve — not a universal recommendation, just a reference point for what quality construction looks like.

